How I made it: BOTW Fisherman's Shield

IMG_2872.JPG

When I started this week, I didn’t figure I’d be doing any sort of big prop build or anything. I’ve dipped into playing Legend of Zelda: Breath of the Wild quite a bit in the last couple of weeks, and I realized that it would be pretty simple to make one class of shields that you can pick up in the game.

One of the things that I love about this game is how much cool design is in it. There are tons of weapons, costumes, and equipment that you use throughout the game. I made Bram a costume from the game a couple of years ago, and while he’s outgrown it, I’ve still got the Shiekah Slate and Guardian Sword ++ hanging in my workspace.

I didn’t end up making a shield for him that time around, but it’s something that’s been in the back of my mind over the years since I started playing. Somehow, the idea got into my head on Monday that I could build one pretty simply. I took a bunch of screenshots, and began looking at the designs. There are three that I liked in particular: the Emblazoned, Hunter, and Fisherman’s shields, all of which have roughly the same design: they’re made of wood, with a metal edging and painted design.

After doing a little looking around online, I figured out the best way to build this: glue together a couple of boards, then cut them into a circle. Fortunately, I have a pile of 1x4 boards behind my shed, and I ended up cutting down two of them into 2 foot lengths.

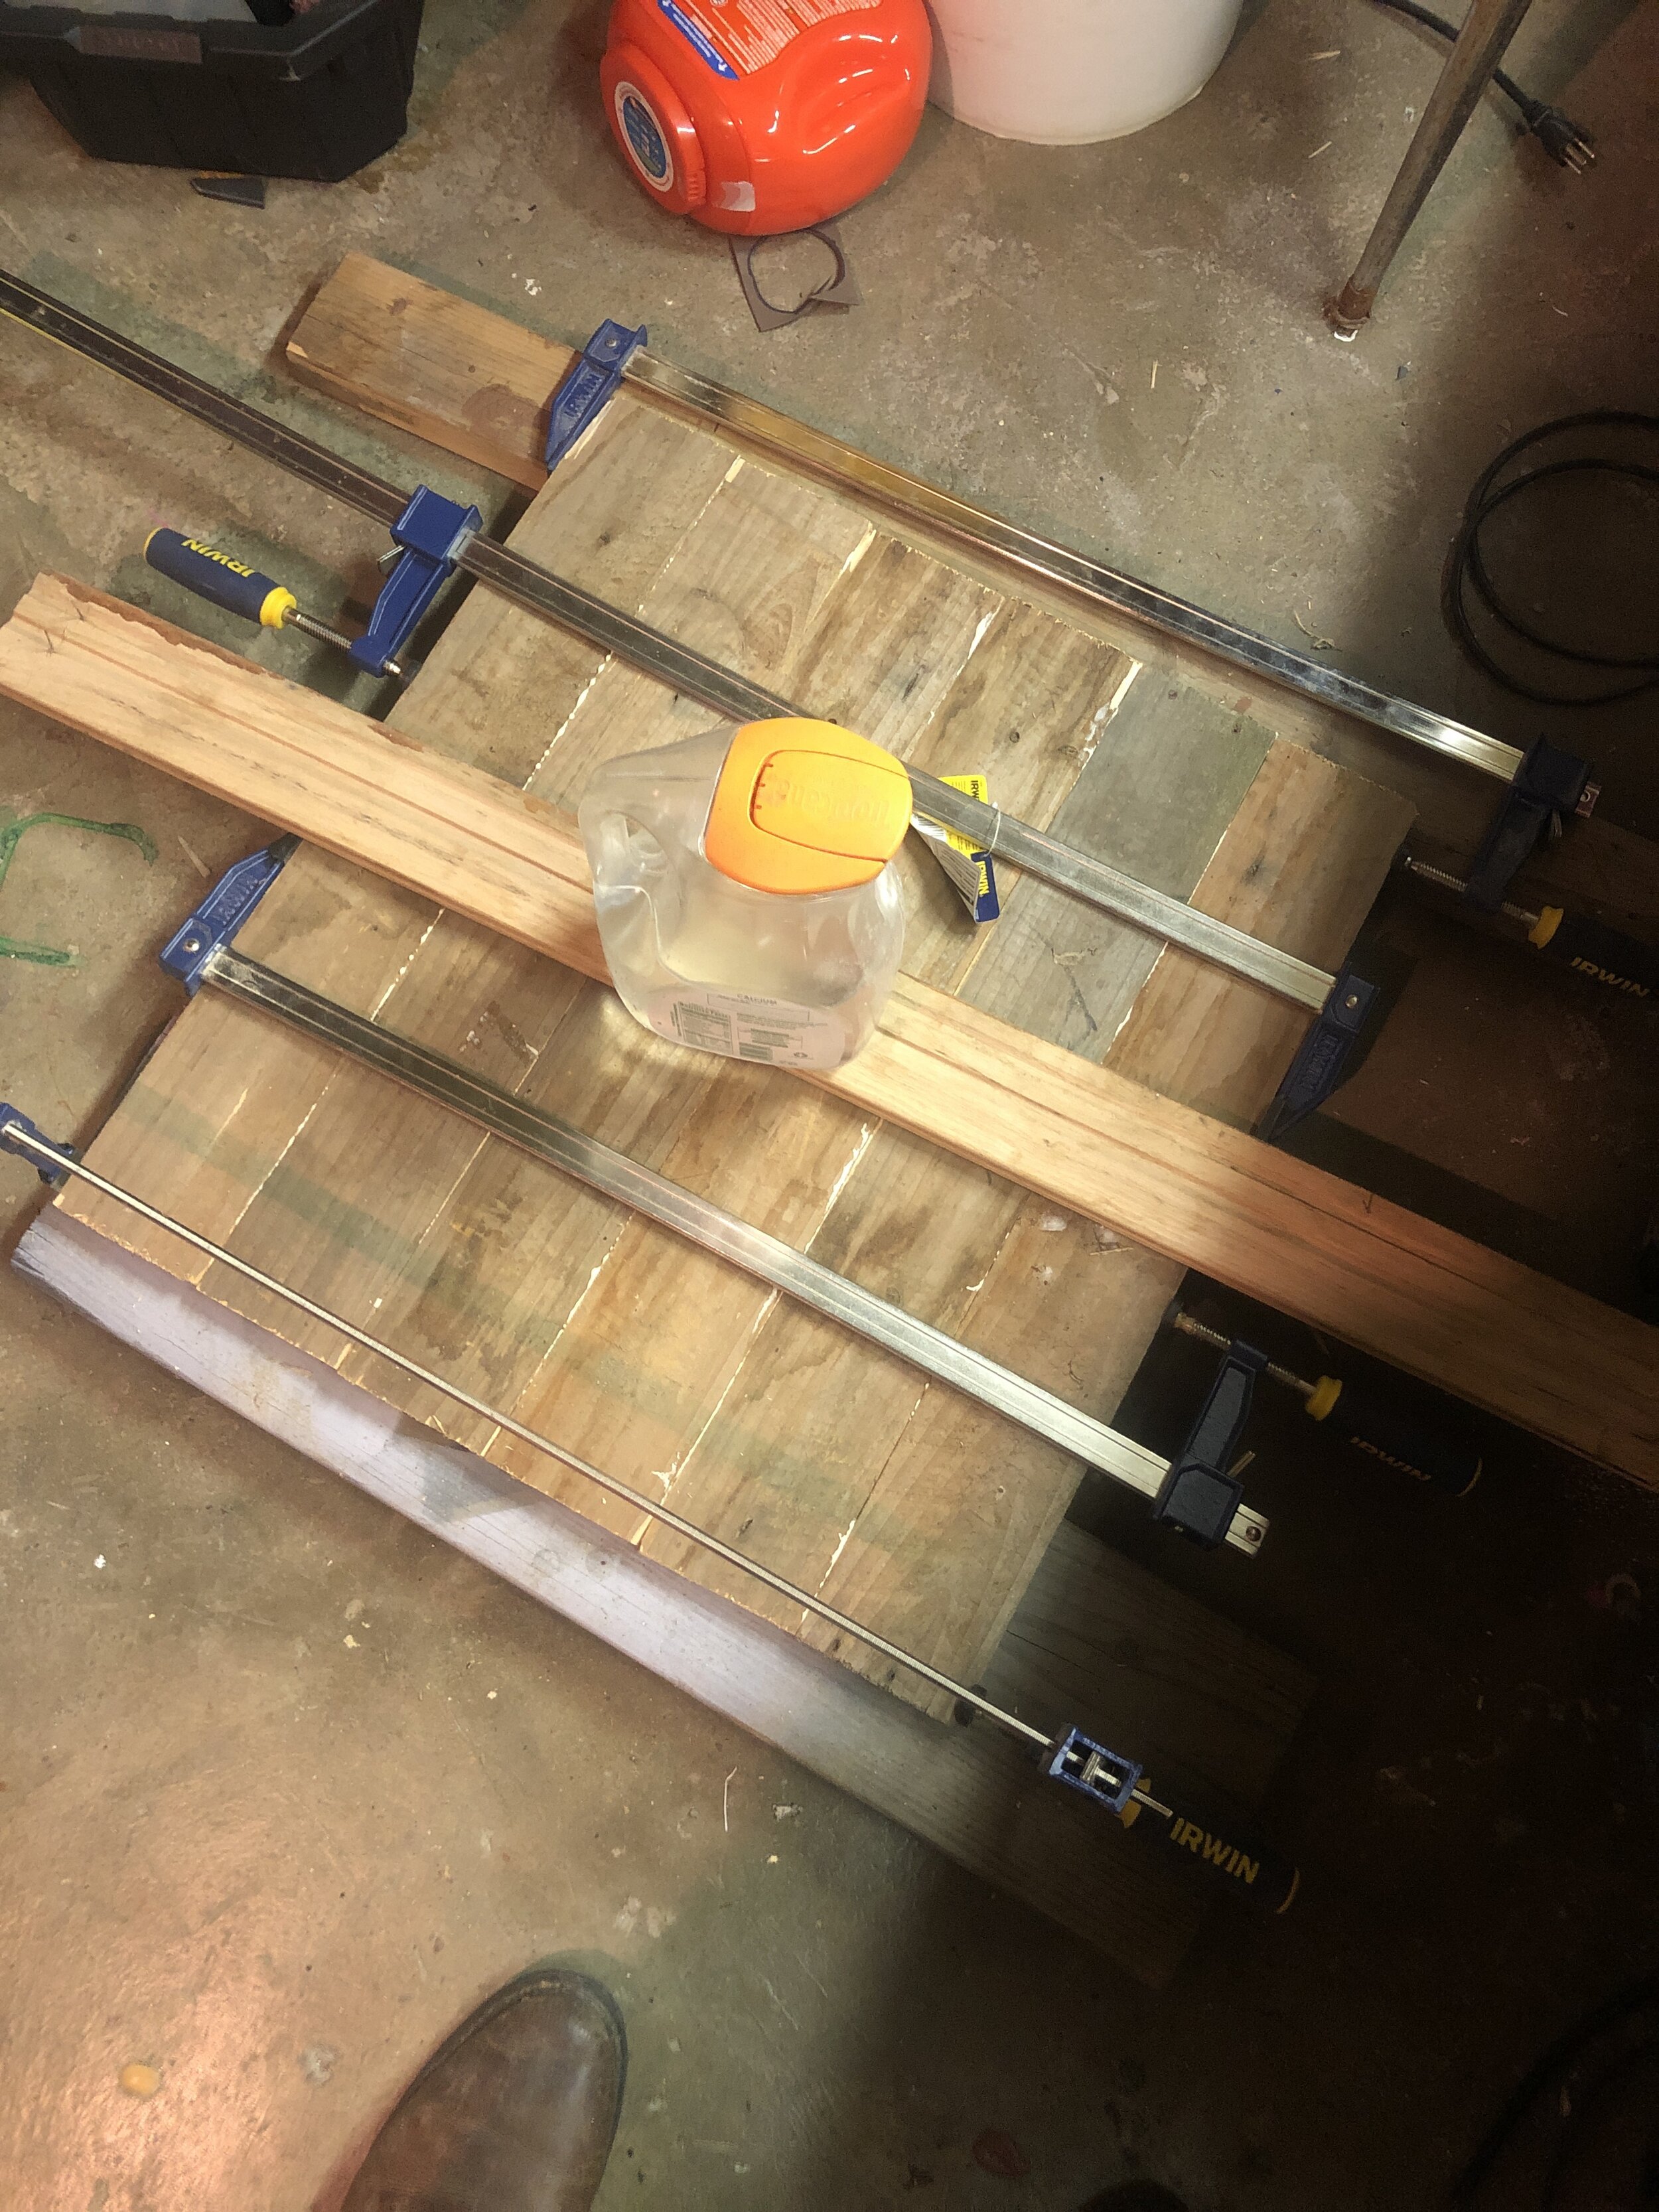
From there, I glued and clamped them together, and let the new slab sit overnight.

IMG_2843.JPG

I let that dry overnight. (The board and jug of water on top is to make sure it lay flat-ish — it popped apart the first couple of tries when I clamped them together) In the morning, it was fully dry. I figured out where the center was, and drew out the outline of the shield, then cut it on my bandsaw. Once that was done, I took a sander to it to smooth down some of the roughness, and then a planer to take down some of the high points. I didn’t do too much here: I wanted to leave some rough surface to make it appear rough-hewn and a little less polished. Once that was done, I bought a handful of bolts and nuts, and pre-drilled the holes for them to go into.

I picked up a roll of aluminum flashing with the intent of using that as the metal edging. Tutorials that I’d seen online showed a method for folding it over the edge in tabs. I started with that, measuring out a ring and used resin to hold it into place. But once getting it on there and once I started to fold it down, I realized that it just wouldn’t look good: I’d have to fill in the lines with bondo or something, and it wouldn’t quite have the same effect. I ended up tearing that off and started from scratch, using a sheet of thin EVA foam for another project. This time around, I just traced out the outline and cut out a ring.

EVA foam is wonderful (I’ll be talking a lot about it in my book), but you can’t jut paint it up: there’ll be little bubbles and holes. I thinned out some Elmer’s glue to use as a sealant, waited for it to dry, then hit the entire thing with some metallic spray paint. Because the bolts in the ring had to match, I painted the tops as well. I set those aside to dry, and moved onto the next part: painting the shield face.

IMG_2867.JPG

The first step was to paint on the background: I mixed up some blue and green to get the approximately right color, and painted it on. Once that dried, I took coarse sandpaper to the surface, roughing out the lines between boards in a way that matched the one in the game. I used my Dremel to score in the deeper gouges. Weathering is a critical part of any costume. I’ve described it as a story in and of itself, because it conveys that the object has gone through some sort of journey of its own. The scratches and gouges show that something happened to it.

Those lines proved to be really useful for the next part: the fish. I ended up hand-sketching this on, using the lines as a guide for width and hight for the various triangles. I sketched out the outlines in pencil, then painted them up in light blue and yellow. They’ll need another coat once it dries completely, but the first coat went on really well.

IMG_2869.JPG

After that, I had to put the ring on, now that it was dry. I put the ring on the front, then flipped it over, using a pick to mark where needed to make a hole for the bolt in the foam. I used another attachment on my Dremel, and drilled in the holes. Note to self next time: measure out the holes a bit better, or mark which ones are which. It turned out that there’s only one way for it to go on once the holes are drilled in, and it took a little while to figure out the right orientation.

Once I figured that out, I put the bolts in, screwed on the nuts, and tightened them: I didn’t do so too tightly, but enough that the bolt sank into the foam a bit, making it look as though it was really driven in hard enough to bend the “metal”.

With that, it was done — ish. I’ll touch up the paint a bit, shave down some of the foam edging, and then wait for for the weather to warm up a little tomorrow to hit the entire thing with a coat of matte clear coat. Once that’s dry, I’ll add on a little extra weathering and grime around the edges, gouges, bolts, and so forth, to give it a little more of a used look. After that… I’ll have to find some space on the wall.

This was a lot of fun, and when I started, I expected it to take a week or so. It came together really, really fast, which surprised me a little. I think this was a combination of a) acrylic paint drying really quickly, and b) it’s not really a hard form. I’ve got plenty of other boards lying around, so this likely won’t be the last one I make. Next time, I’ll do a little more to make sure that the boards are completely flat, that the circle I’ve drawn is a bit better, and will probably take a little more time to sketch out the design. This one came out pretty nicely, but there are little places that I’d work to improve upon for next time.

EDIT: touched up the paint, clear-coated and weathered it. I can say that now it’s done:

89983466_10100336743036751_4821291967344279552_o.jpg


The Book is DONE

So…

Screen Shot 2020-03-06 at 3.57.58 PM.png

I wrote a book!

The first draft of Cosplay: A History, or whatever we’re going to call it, is now complete. And by complete, it’s like a house with walls, a roof that’s leaking, and that’s in dire need of some more furniture, plumbing, and a couple of coats of paint.

But, that first draft is done, and it came in quite a bit longer than I thought it would be. If all goes well, it’ll get longer yet: I have a ton of interviews with a ton of cool people, and there’s a lot more to include before this is done. Like any history project I’ve ever worked on, there’s always something cool to add, and at some point, it’ll be done-done.

The book is now turned in, and it’ll go through the whole editorial process, notes, comments, and beta readers, then publishing. I honestly have no idea when it’ll work its way through that system. Hopefully, you’ll be able to get your hands on a copy in the near future.

Now, I’m going to go play Star Wars Jedi: Fallen Order, which has been my self-imposed reward for finishing.

Costumes in progress

IMG_8063.jpg

While I’m writing a book about cosplay, I figured it was a good time to take a look at my own list of costume projects that have been in the works for a while. I’ve got a bunch of things that are in the works, above and beyond the costumes I already regularly use (Stormtrooper, First Order Stormtrooper, AOTC Clonetrooper, Shoretrooper). I’ve been meaning to take stock, to figure out what I need to do to clear off the to-do list.

Here’s what I’ve got, ranked in order of most complete to just shy of pipe dream.

First Order heavy trooper, The Force Awakens

This costume is actually done, wearable, and 501st approved, but there’s some additional things that I’m working on to flesh it out. I’m getting a friend to print me up an F-11D blaster for my First Order trooper, and I need to get a pistol for the thigh as well. I’ve got a couple of parts for a set of quadnocs that they carry around to use for troops where I can’t carry a blaster, and need to get the rest printed up. I also need to get the backpack painted — there’s some small details that I need to finish up on it, before I figure out how to get it attached to the costume itself. I saw someone at Celebration who had attached it to their equipment vest, and I might try and do something similar, rather than bolt it to the back of the suit, something I’ve been wanting to avoid.

212th Airborne Clone Trooper, Revenge of the Sith

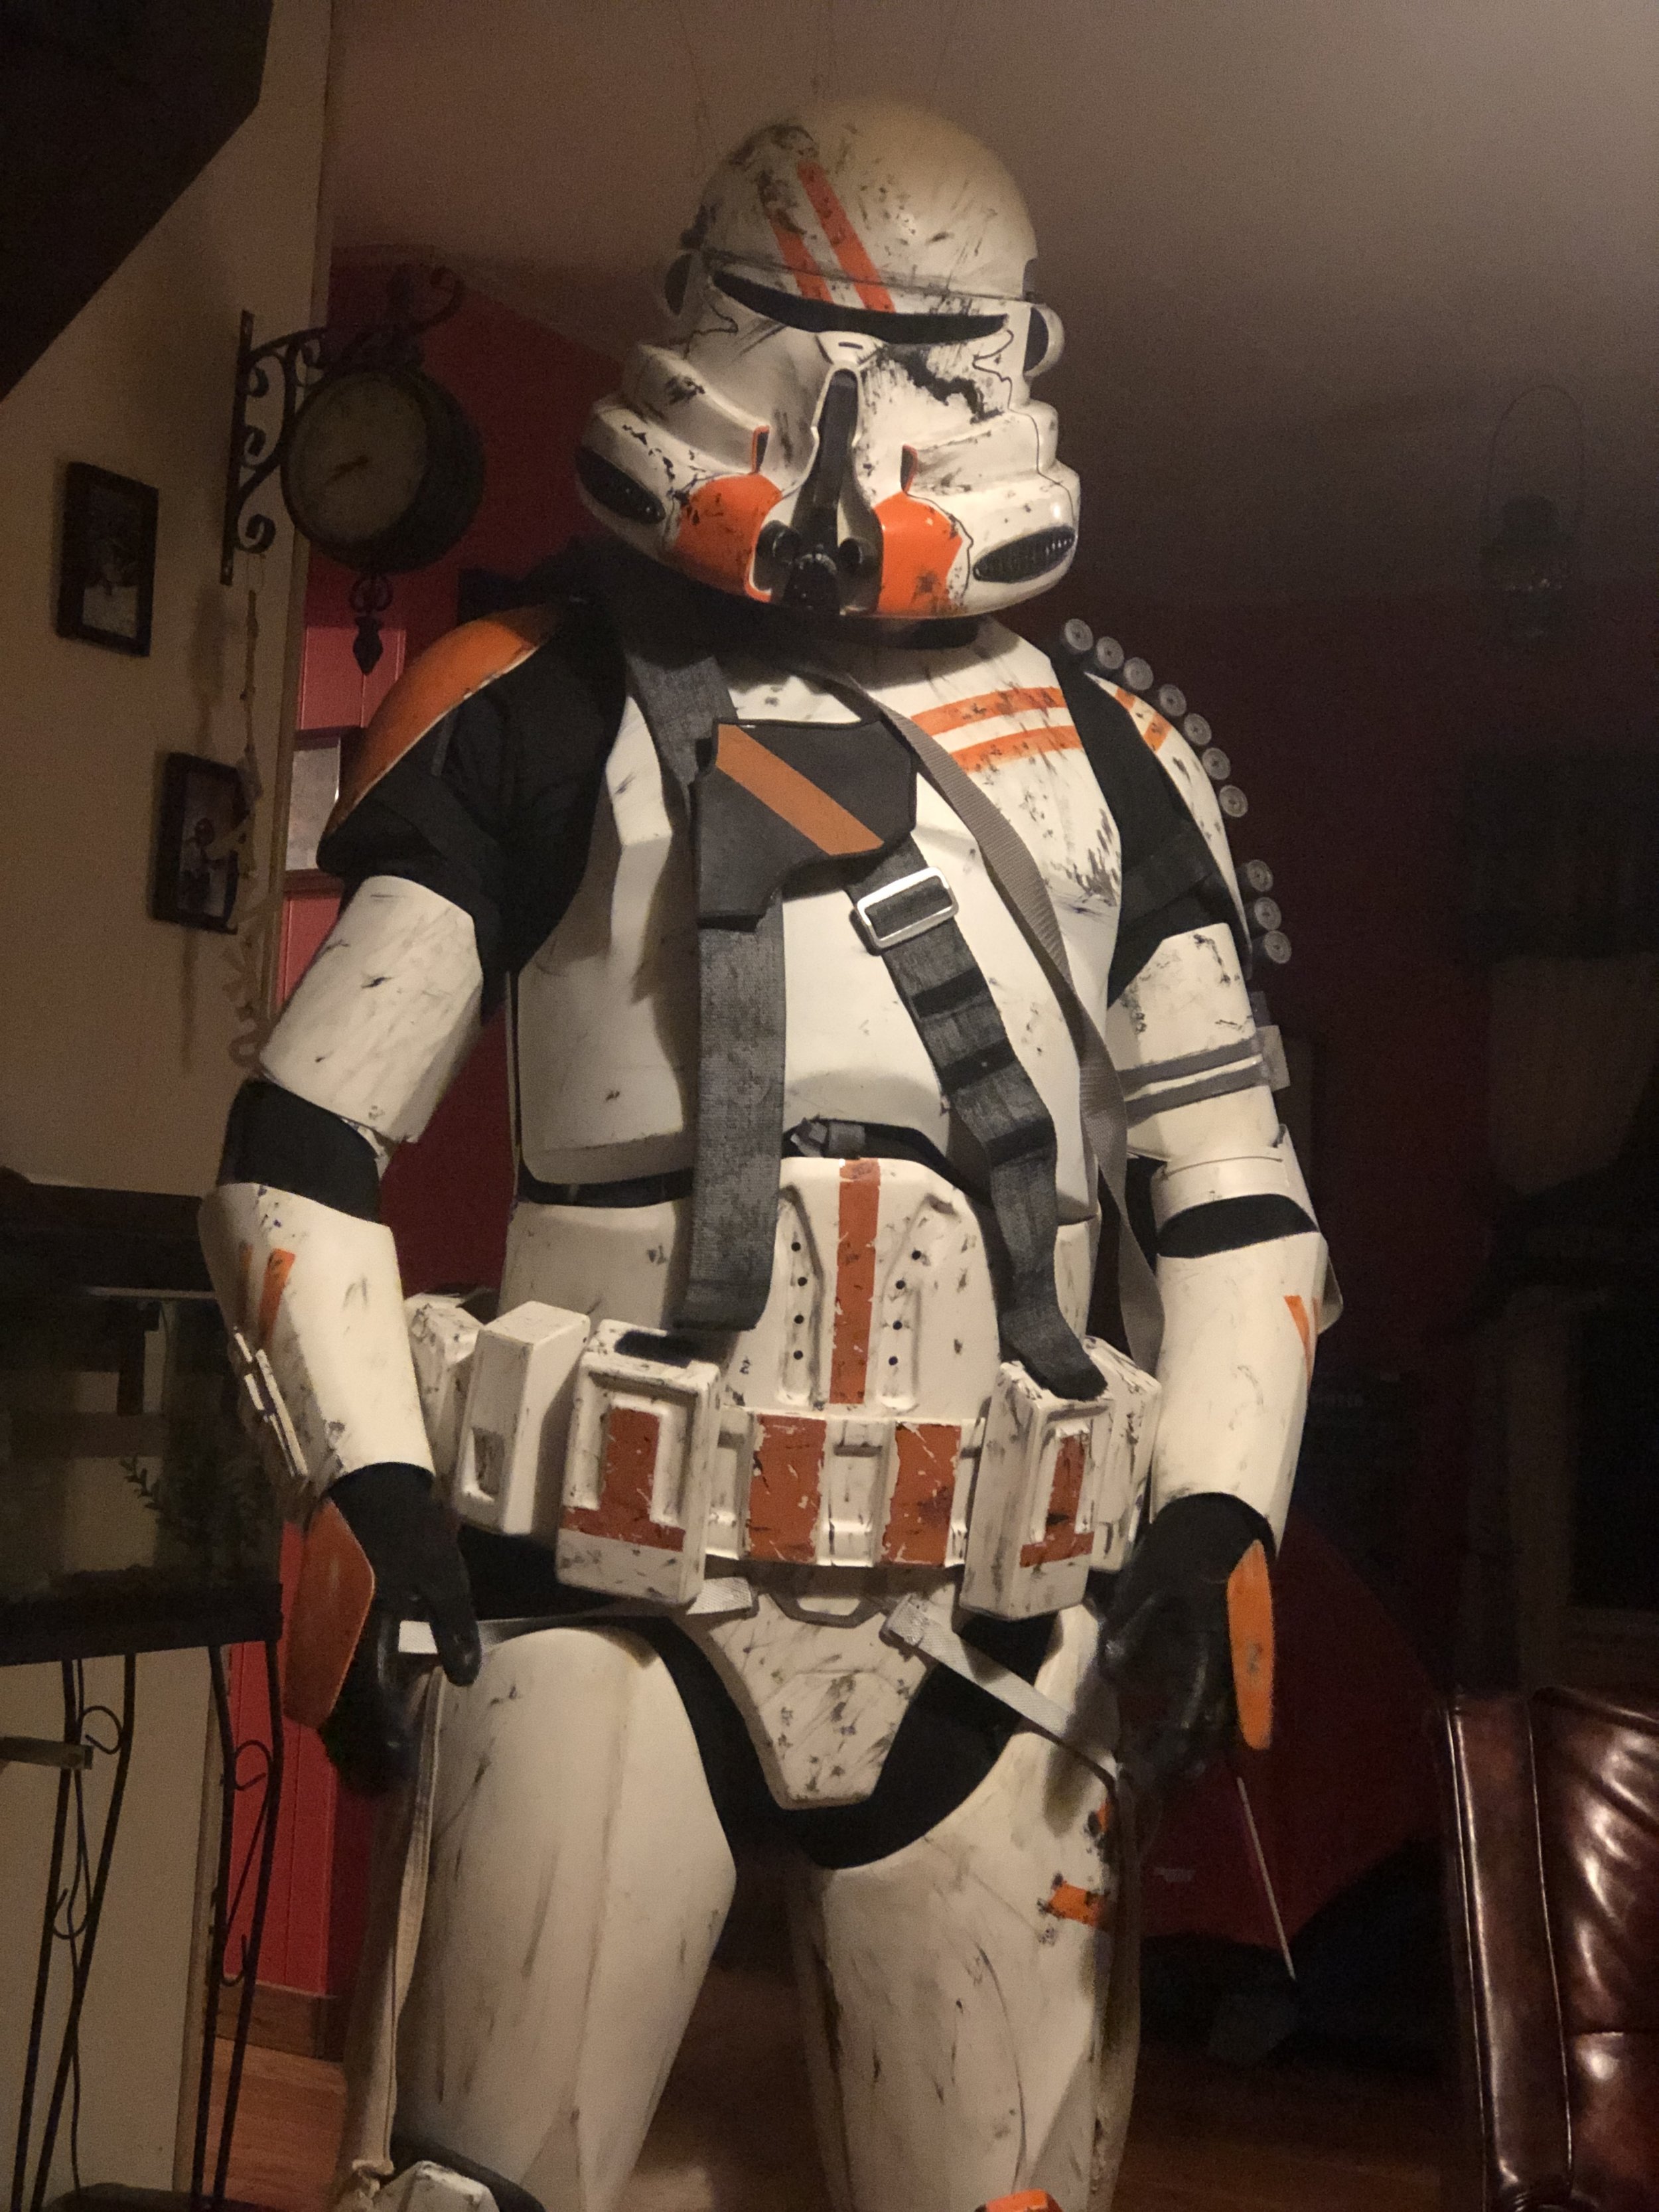
I love this set of armor. It looks fantastic, and I really dig the orange-and-white color scheme, as well as all the gear that’s on it. I do like the 501st Legion clones from The Clone Wars, but the 212th Attack Battalion is by far my favorite.

A couple of years ago, I picked up the armor for this trooper, in trade for another clone that I’d made for Megan that she wasn’t wearing. This is the costume that I’ve got that’s closest to being completed: it really only needs some minor adjustments to get it to sit right. I tried it on recently, and really just need a spare set of hands to help me figure a couple of things out.

Some of the minor things: I need to put some screw on micro-grenades on the left shoulder bell (they’re held on with glue, and have a tendency to pop off. The shoulder strap needs some Velcro, I need to trim out a bit of the knee pads so that the foam isn’t visible, and I need to do something with the Kama.

The biggest issue so far has been the shins, which I haven’t been able to wear at all until now, because of how the 501st Legion handles approvals. I’ve made a small fix to allow me to get them on, and I think that that’ll work eventually with some fiddling. It’s definitely a costume that’s going to require a dedicated wrangler to get dressed.

Shoretrooper Grunt or Captain, Rogue One

So, I liked the Shoretrooper well enough that I went out and bought another one when it was on sale, with the intention of building it for my wife. This one’s fully trimmed out, but it’s sort of been languishing for months, because she’s pregnant and won’t fit into it for at least this year. So, maybe I finish it? Maybe I sell it? Who knows?

Sam Bell, Moon

This was a fun costume to throw together, and it’s another comfortable, casual con one. This one has all the patches on it — I just need a bigger logo decal for the back of the jumpsuit (I think that’s an iron-on thing), and it’ll be 100% finished. I’ve ordered one of the yellow shirts (Wake Me Up When It’s Quitting Time!) to wear under it. I’ve been searching for the red had that he wears, but it’s not required. I should find a pair of cheap aviators to hold in a pocket or something. Maybe I can find a coffee mug with the logo on it as well.

Jack Cooper, Titanfall 2

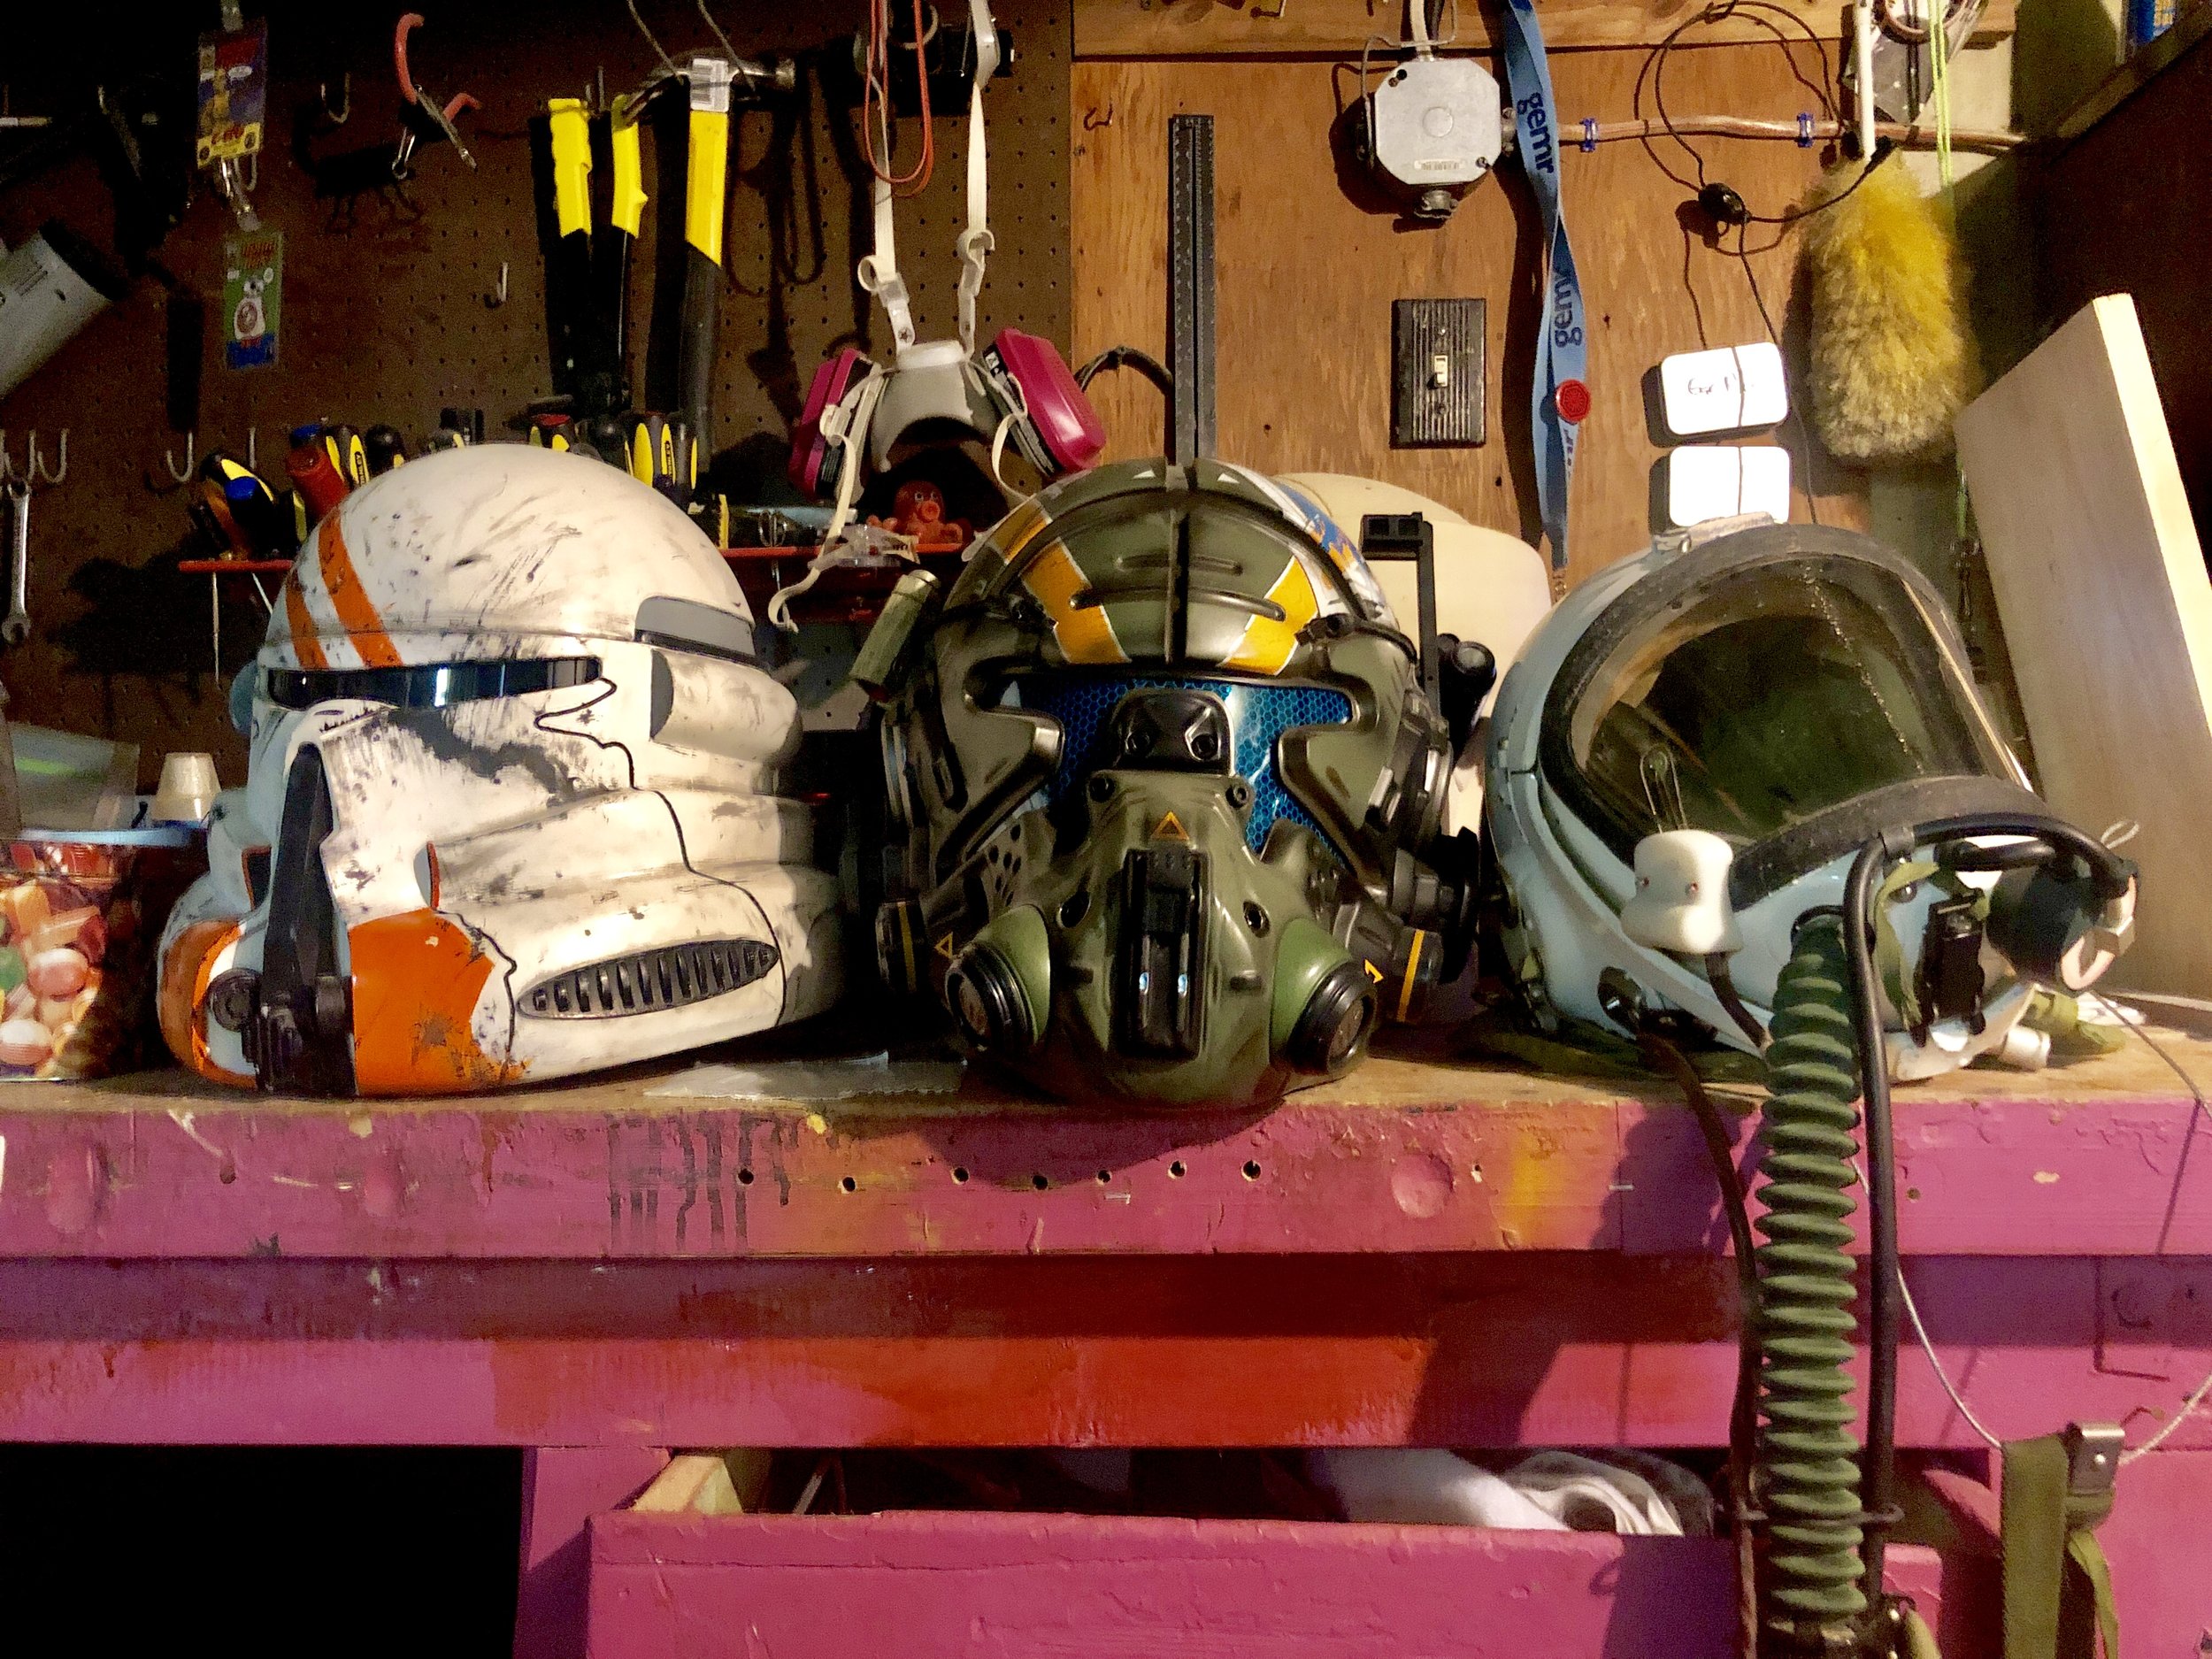
This is sort of a casual thing that I haven’t gotten around to doing yet, but I have the main component already: Cooper’s helmet. I loved Titanfall 2, and particularly the look and feel of the pilots who drive the giant mechs around.

Helmets are usually the most distinctive part of a costume, and this one is one of those rare pieces of merch that’s out there. I picked it up on sale a couple of years ago, and it’s a really nice piece. I’ve also ordered a pair of gloves that should work for this.

After that, I need the rest, and need to do a lot of research. At the very least, I need a red jumpsuit, and a bunch of accessories. I think I can get away with regular combat boots, but I need a pad for the shoulder (which I can get printed), knee pads (which I can probably modify from existing ones), body armor (not sure how to make that yet), knee coverings (probably something to sew together and strap on), combat knife, ammo magazines, the jetpack (not sure how to do that just yet), and a gun or two (which can be printed up). So, a lot to do, but a lot of the parts are out there, provided I get some time with a 3D printer.

ODST, Halo ODST

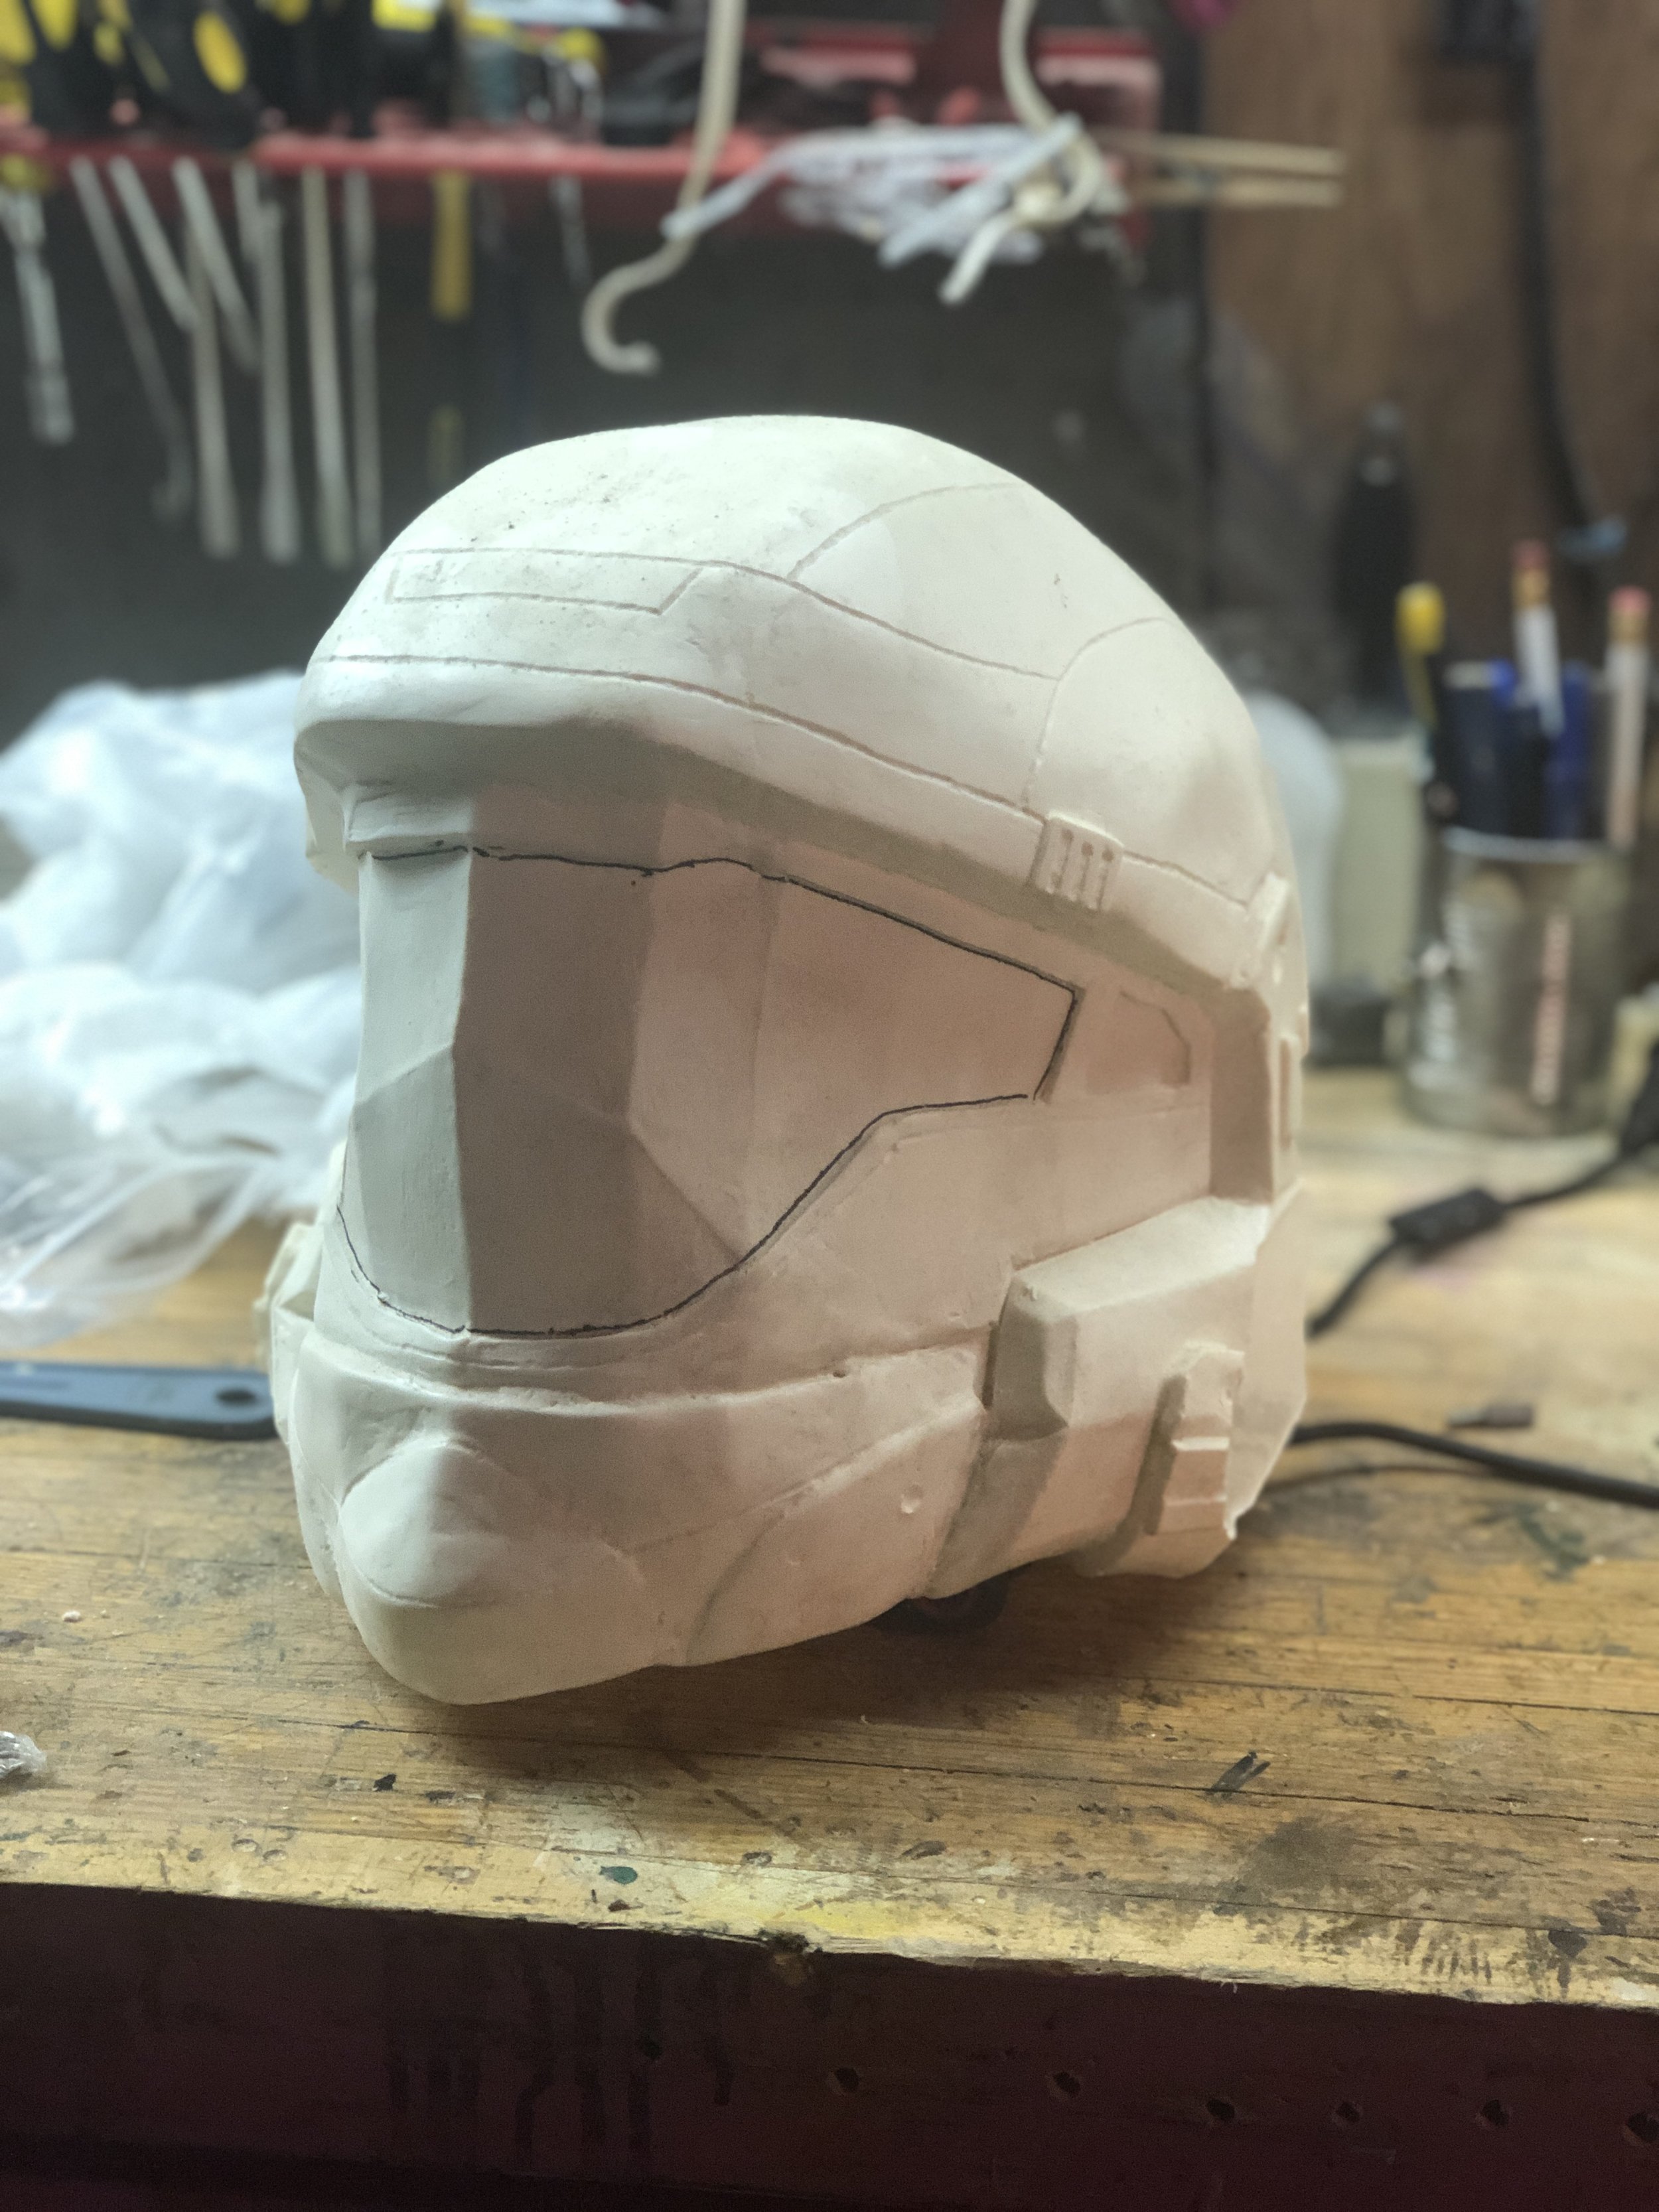
I have a random ODST helmet that a friend made years ago, with the idea of putting together an ODST costume at some point. I honestly thought I’d gotten rid of it, but I’m starting to think that I might just go and do it. There are a ton of printing or foam options when it comes to armor, and it could be a fun one to do. First step will be to finish up the helmet and get that cleaned up — it has some soft details in place, but i think that’ll be okay once it gets painted up. Not a huge priority, but it might look cool on a mannequin.

Belter, The Expanse

I don’t have anything for this one yet, but it’s a pretty easy thing to put together: blue jumpsuit, a bunch of patches, boots, fake tattoos. Should be pretty easy to put together, and like the Sam Bell costume, it would make for a good one for walking around a convention. There’s a growing group of people doing these costumes as well, which is cool. I’ve also got a helmet that was the base for a belter spacesuit helmet, and I need to do a bit of printing to get all the parts for that together.

Update: ordered coveralls and patches. Should be easy to throw together once they arrive.

Martian Marine Armor, The Expanse

Okay, this is the most ambitious project I have on my plate, and it’s a particularly fun challenge, because i haven’t worked a whole lot with foam yet. I’ve really wanted to put together Bobbie’s armor from The Expanse, because it looks awesome, and because Bobbie is one of my favorite characters from the series.

I have a bunch of foam mats that can be used for it, and looking at the armor itself, the shapes aren’t all that complicated. I need to do up a body drawing to get the basic shapes of each piece of armor sketched out, then do some trial-and-error. There’s a lot there — shoulders, upper arms, forearms, chest, abs, back, thighs, knees, shins. It’s on par with a stormtrooper with piece count, and it’s a bit more complicated, although some bits look like they should be pretty easy, like the thighs, shoulders, upper arms, and knees.

Someone in one of the Expanse costuming groups has been modeling the helmet, which would make things a whole lot easier. People have already begun sourcing the undersuit, which is cool, and another big component to check off the list.

Other Stuff

IMG_1210F98BF11B-1.jpeg

I have a handful of other things that I’ve been working on. I’m working on a ChemRail rifle from the movie Elysium, which just got its first coat of black paint. That’ll need another coat, some detail work, like coloring in the lettering, and painting the magazine, and a couple of other things here and there. This one doesn’t go with a costume, but it’ll make a nice display piece when it’s finished. I’ve also got some pieces of a Han Solo blaster that I’ve started printing out, but my printed is out of commission right now, and also a little too small for what I need. Might need to outsource that, but it’s not exactly a huge priority.

I’ve also got a couple of round satellite dishes that I acquired years ago from a friend, with the thought of turning one into a Captain America shield. After watching Avengers: Endgame, I’m thinking that I might start that project up again (if I still have them), with the intention of putting together something to mount on a wall.

Somewhere in there, I need to make a costume for my son for Halloween. Spider-man is a favorite right now, but that could obviously change at some point.

Finally, after Celebration, I ran into a couple of people who were suited up as Blue Squadron pilots from Rogue One. Imperial Boots sells the entire ensemble (minus the helmet), and while it’s a bit pricey, it looks fantastic. I’m very tempted. Maybe I’ll sell off the unfinished Shoretrooper to fund this.

I'm writing a book about the history of cosplay!

5223717678_45940ecb7f_o.jpg

Some personal news that I can now announce: I’m writing a book about the history of cosplay!

I’ve been calling the project Cosplay: A History, (something that might change), and it should be out by Summer 2021. Syfy has the details here.

But as fascinating as the current state of cosplay is, Liptak is also interested in exploring where it came from by researching the history of halloween costumes, Hollywood designers, and old costume masquerades from the earliest conventions. Cosplay: A History is a deep-dive examination into the dynamic story of cosplay and how it has grown to become a world-wide phenomenon.

Seth Fishman sold the book to Joe Monti at Saga Press, which I’m extremely excited about. Saga has published some really great books in the last couple of years (Seriously, I’m sharing the same space with people like Kameron Hurley, Rebecca Roanhorse, Ken Liu, Elizabeth Bear, Theodora Goss, and more — to say that I’m feeling imposter syndrome is an understatement.)

I’ve spoken with Joe a bunch of times over the years, and the topic of cosplay came up more than once. Those conversations dovetailed with a growing interest in Cosplay. I’ve dressed up in armor with the 501st Legion for more than a decade now, but I’ve begun thinking and writing about how people come together in larger communities over a shared interest in suiting up as their favorite heroes. I’ve written about costuming for outlets like io9 and The Verge, spoken about it on Vermont Public Radio and at Norwich University. In particular, I’ve gotten really interested in how the movement formed, and how it’s changed over time as new franchises pop up and as makers have begun to use new techniques to make costumes.

This book will be an attempt to expand on some of the writing that i’ve done over the years, looking the roots of cosplay and how costuming became this big, global phenomenon, how internet culture has helped shape it, and what it means for the future of entertainment. It’ll include interviews with folks about their involvement in the space, along with photographs of people I chat with along the way.

Obviously, there’ll be some nerding out about the 501st Legion, but also things like 3D printing, the rise of Comic-Con, and historical reenacting. I’m also hoping to talk about the wide range of costumes that are out there, from the marquee superheroes to the obscure characters that show up in the background of the Mos Eisley Cantina.

20046762_1001080719751_5090273547021363115_n.jpg

What I’m hoping to ultimately cover in this project is the relationship that people have with stories, and how costuming brings them closer to the characters and worlds they love, and how it allows them to interact with the text in unique ways.

I’ll be working on the book this summer and fall, and I’ll likely have a bunch of updates and anecdotes as I do so. The best way to stay up to date will be to sign up for my newsletter, but I’ll probably be posting up pictures to Facebook, Instagram, and Twitter while I’m at conventions or generally researching it. I’d also like to hear from cosplayers from all eras — I’ll be setting up a way to get in touch about that.

New Project: TST ChemRail Rifle from Elysium

IMG_6791.jpg

I’ve got a new prop-building project that I’m embarking on: a TST-ChemRail rifle from Neill Blomkamp’s 2013 film Elysium.

I’m a big fan of the film — it’s one of my favorites out there, with a solid story, fantastic worldbuilding, and messaging. Not everyone agrees, but it’s one that I’ll stand by. One of the things that have always impressed me with Blomkamp’s films is the design of the world, and Elysium’s far-flung future is loaded with military gear and tech. In particular, I’ve always really liked the ChemRail gun that’s used at a pivotal point in the film — Max grabs it when he’s onboard the station, and uses it as he works his way to the control center. It’s a futuristic weapon, but one that’s functional and realistic-looking device that isn’t cartoon-y, like so many science fiction weapons can be.

Last fall, the Replica Props Forum posted up a couple of pictures on Twitter from one of their member-builders: a ChemRail gun that they had designed based on reference images and sold as a 3D-printed kit.

I ended up splurging on it at the end of the year, figuring it would make for a good build project. It just arrived earlier today, and I’m really impressed with the quality and detail. The print is extremely clean (ANY seller who cleans up their 3D prints before shipping is appreciated) and finer details like logos and functional pieces are printed right into the design. It isn’t an exact match — I spotted some tiny things that differ, but they’re unnoticeable if you don’t know what you’re looking for.

IMG_6795.jpg

The printed blocks are also finely-printed, which means that they won’t need a whole lot of cleanup anyway — a bit of sanding, then glue, a couple of coats of primer, paint, and then weathering. It’s kind of goofy-looking now, because the printer just threw whatever filament they had on hand to get it finished.

So, step one will be to sand down the entire thing. I did a little with a piece of fine sandpaper to start over lunch, and it works nicely. Fortunately, the original prop models were also 3D printed, and they have some of the print lines remaining, so I don’t actually have to make this super-smooth. The only thing I really need to get for this is a thin dowel to go through the middle, which will provide it with a bit of a spine when everything is glued together.

IMG_6792.jpg


Once it’s done, it’ll go… somewhere. I’ll probably find a way to mount it on the wall in my office. I’m not a huge fan of real guns, but I’ve always thought it would be cool to have an armory of weapons from science fiction and fantasy films at some point.

FOTK: Approved!

Front.JPG.d456f16b1b4a62802c43a338a977b2c7.JPG

This is pretty exciting: my First Order Stormtrooper (known in the 501st as an FOTK), has been approved for use!

This has been a really long, and at times, frustrating build, more so than some of the other costumes I've built over the years. I picked up this kit second-hand, after a prior owner had begun work on it, then abandoned it. This meant that there were some things that had to be undone: bits of glue and other things like that that were left over, while some other things that needed to be done, like sanding and trimming, were complete. 

Getting the suit to fit took some time: I had to make some adjustments, such as with the thighs and calves, as the base kit was a bit too small for me. That necessitated cutting the thighs and expanding them (then filling the new hole with Bondo automotive filler), then lots of sanding. 

Then the painting. With most kits made out of ABS, you don't usually have to paint up a stormtrooper. I've had to paint other kits before: my AOTC Clone and Shoretrooper both got robust paint jobs, but this took a considerable amount of work: first with base layers of primer, then five or six layers of gloss white. I'm sort of satisfied with the end result, but unless you're looking for flaws, you aren't going to find them if you're a couple of feet away. My original goal had been to cover some of the flaws up by weathering the entire kit, but that's not approved for the 501st. Maybe some future film will see them dirtied up a bit. 

This kit is also much heavier than my other kits: at least 50lbs, which makes it uncomfortable to wear; much of that weight sits on my shoulders. There's also the added gasket details on my elbows, knees, and shoulders, which are done with what's essentially an extra set of sleeves over an already not-really-breathable body suit. Even in pretty reasonable temperatures, I get warm fast. It's also difficult to put on: I require help from a wrangler to get the shoes, detonator, shins, spats, ammo vest, and shoulders on. This isn't going to be something I'm going to truck out during the summer months. 

But, the end result is probably one of my favorite kits altogether: it's a badass looking trooper, and the weight of the kit changes my stance to something that's a little more crouched and imposing. 

It's not 100% done just yet. I need to get the two guns that he carries — a longer rifle and a pistol for the thigh holster — and I've got a backpack that I need to figure out how to mount to the backplate. I've got some ideas for how that can be done, but I just haven't gotten around to doing it just yet. 

Building Link's Hylian outfit from Breath of the Wild

DNf8rYqWkAAQeC- One of the unexpected joys that I've experienced this year is Breath of the Wild, an immersive entry in the Legend of Zelda series. I started playing the game back in August, when I lucked out and snagged a Nintendo Switch at the local used game store here. Breath of the Wild was the reason I was motivated to pick it up. I've been a fan of the Zelda games from since I was a kid, and this seemed like a good opportunity to get back into them.
What I didn't expect was that it turned into a wonderful bonding moment with Bram. I started playing the game on my own, but slowly, Bram started creeping up beside me to watch me play. I went from playing the Switch as a tablet to playing it on the television, and together, we explored Hyrule together, figuring out shrines, riding over the plains on horses we captures, or slaying Moblins that we encountered. I felt guilty whenever I played it without him, and essentially played during my lunch breaks to scout out for the night's adventure.

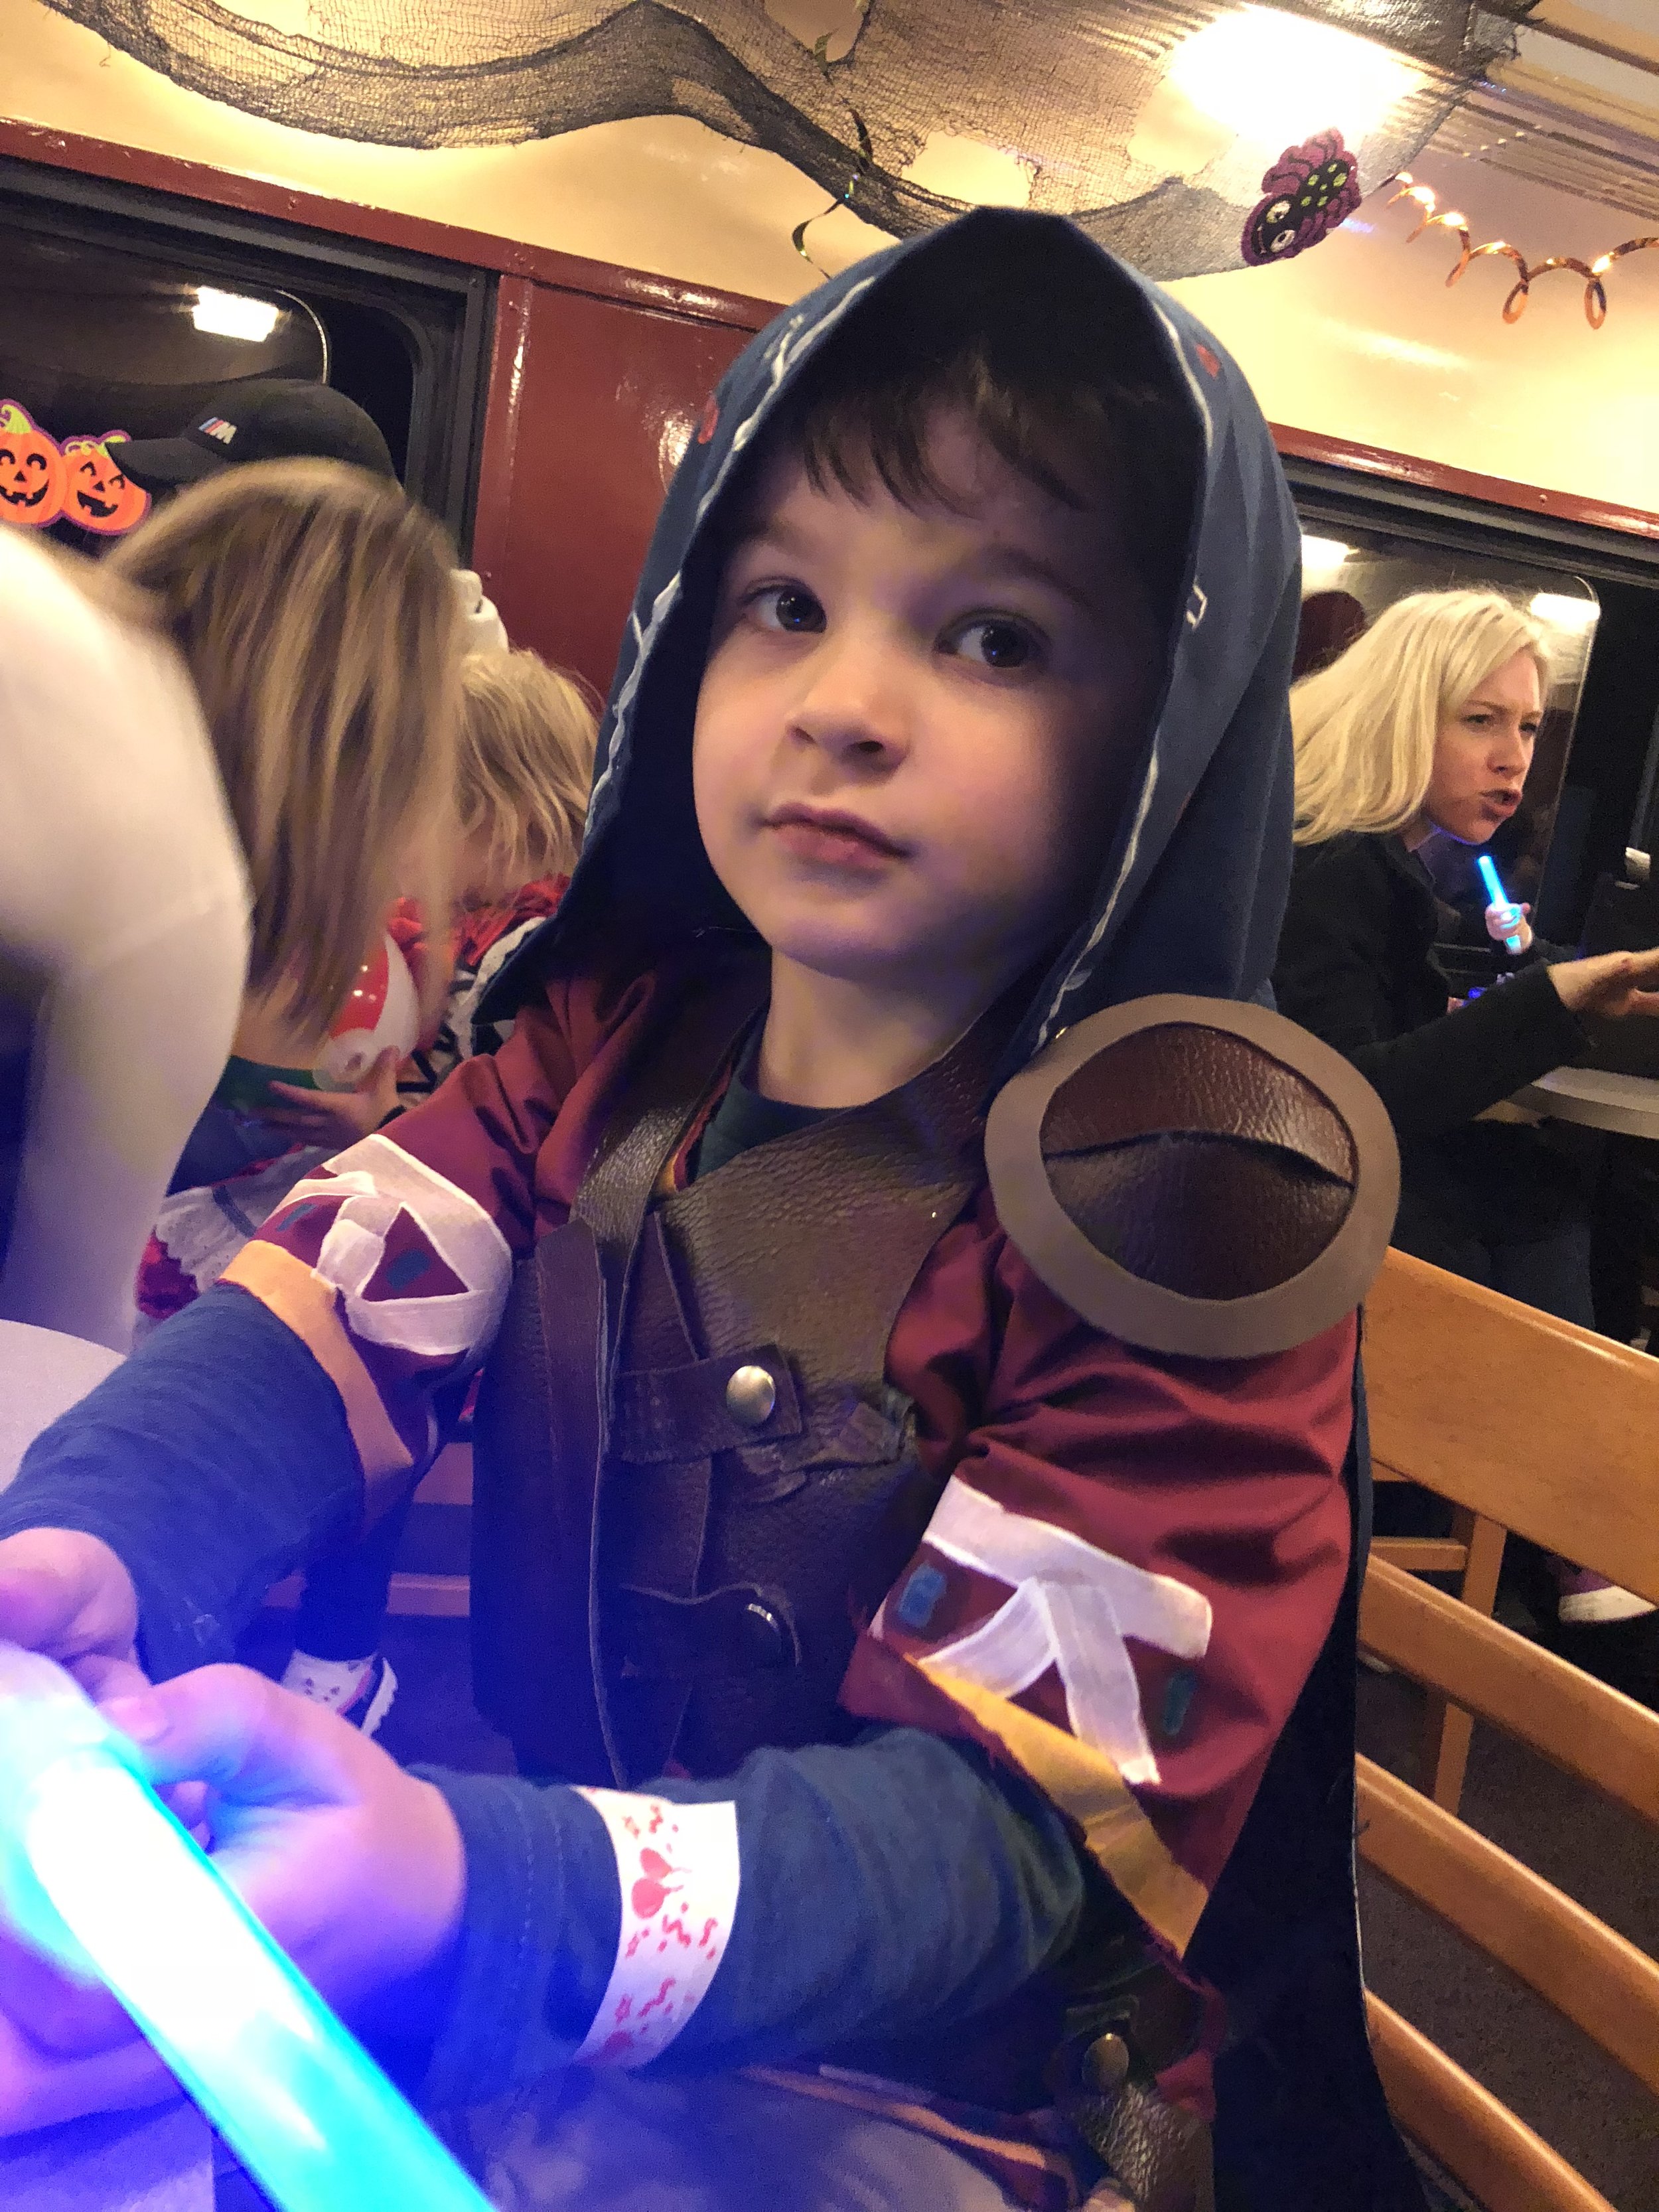
When it came time to start thinking about a Halloween costume for Bram, it quickly became a no brainer: the Hylian outfit that we were playing as. Link is a fairly popular character for Halloween costumes, and I saw a ton of kids sporting the Champion outfit at New York Comic Con earlier this year. But this one was a bit more interesting looking: there were belts, pads, and a cape. It looks interesting and the type of thing that an adventurer would wear in the game.

IMG_0327

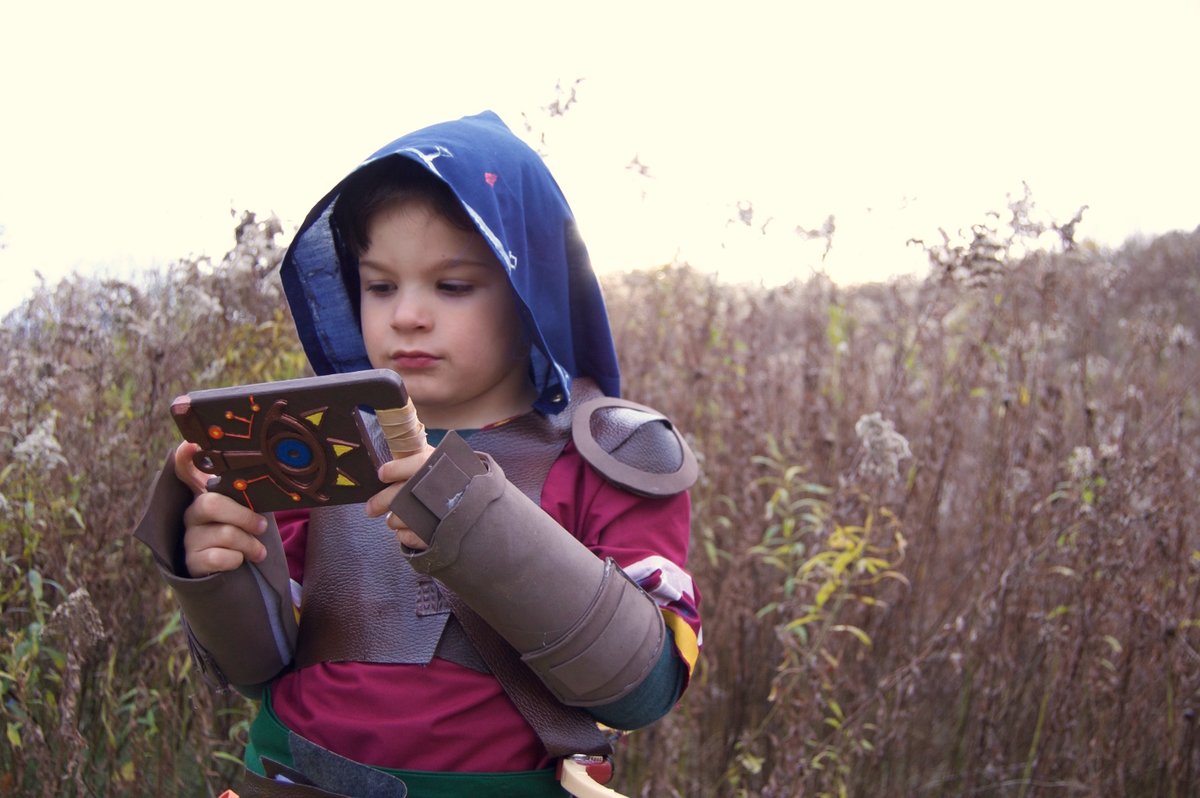
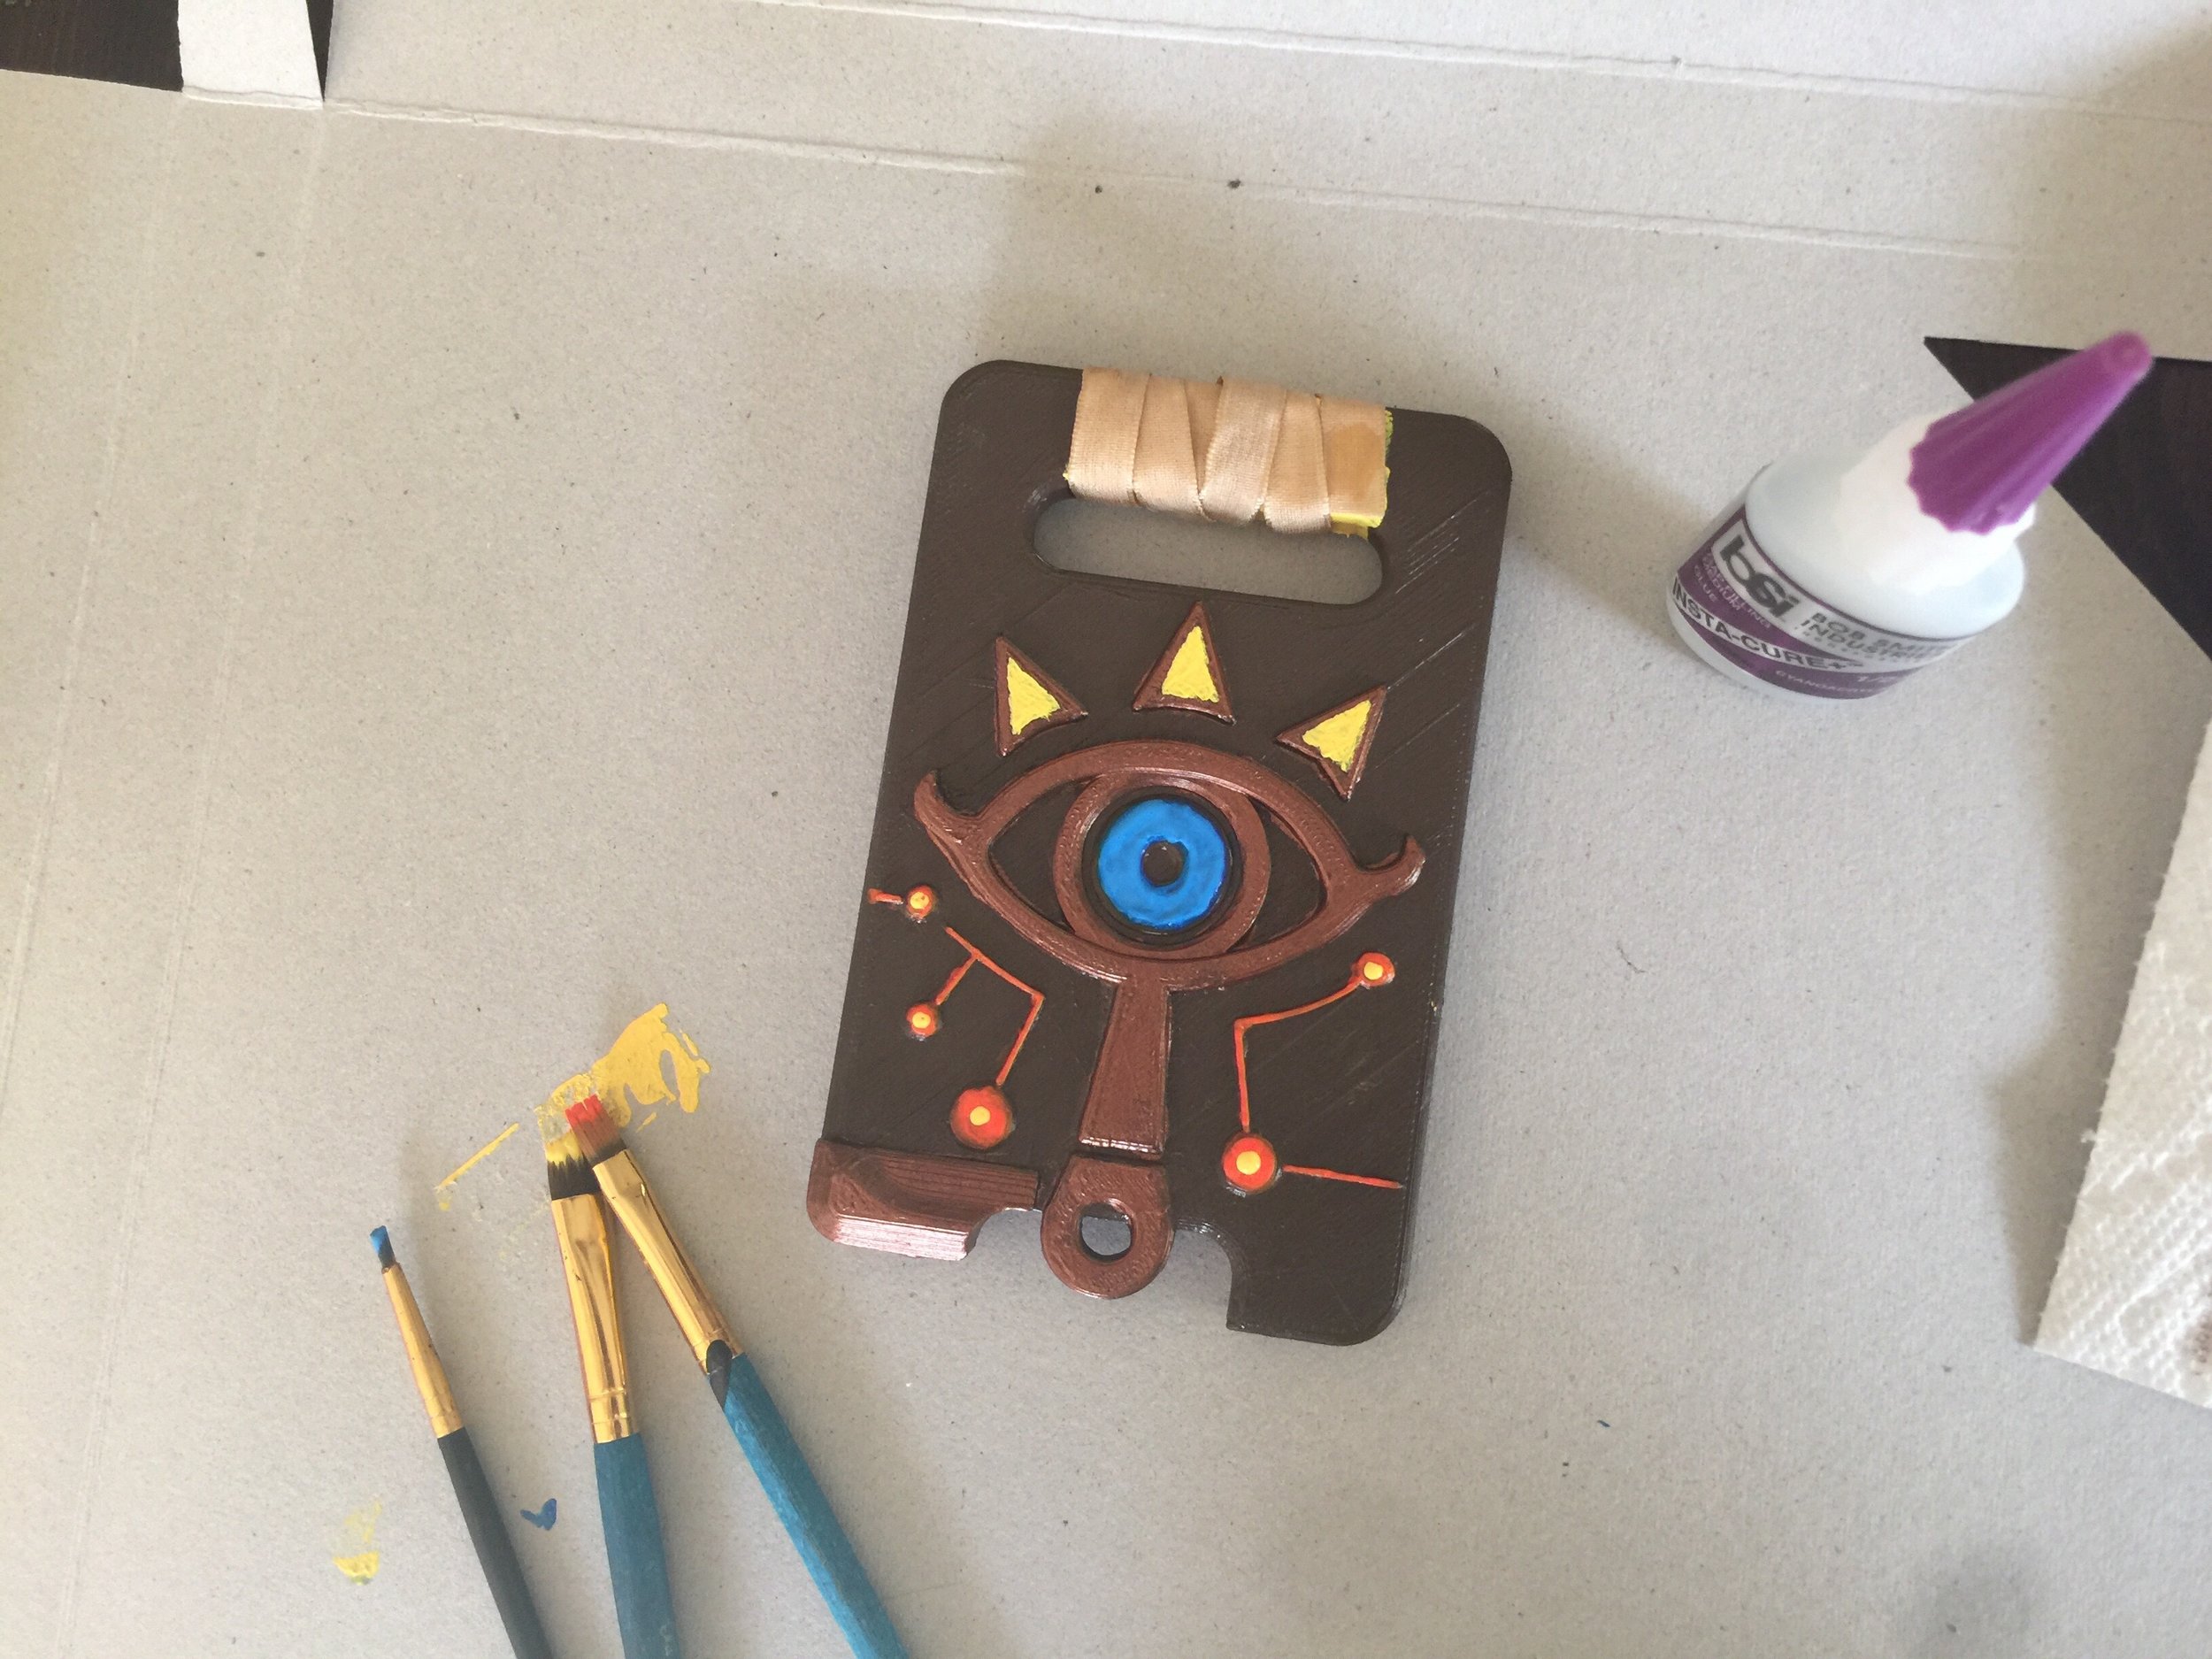
The first component of the costume that I made is arguably the most important: Link's Sheikah Slate, the tablet that he carries through the game, using it to access information or transport. I went to my local library, which recently added a 3D printer to their lineup. It took a day or two to get it printed, and once I had it, I ended up leaving the print lines in, to give it a bit of texture. I then gave it a paint job with brown, copper, orange, yellow, and blue. A bit of ribbon superglued onto the handle gave it a bit of extra detail. It came out really well, and it makes a neat prop, even if it weren't next to a costume.

IMG_0738

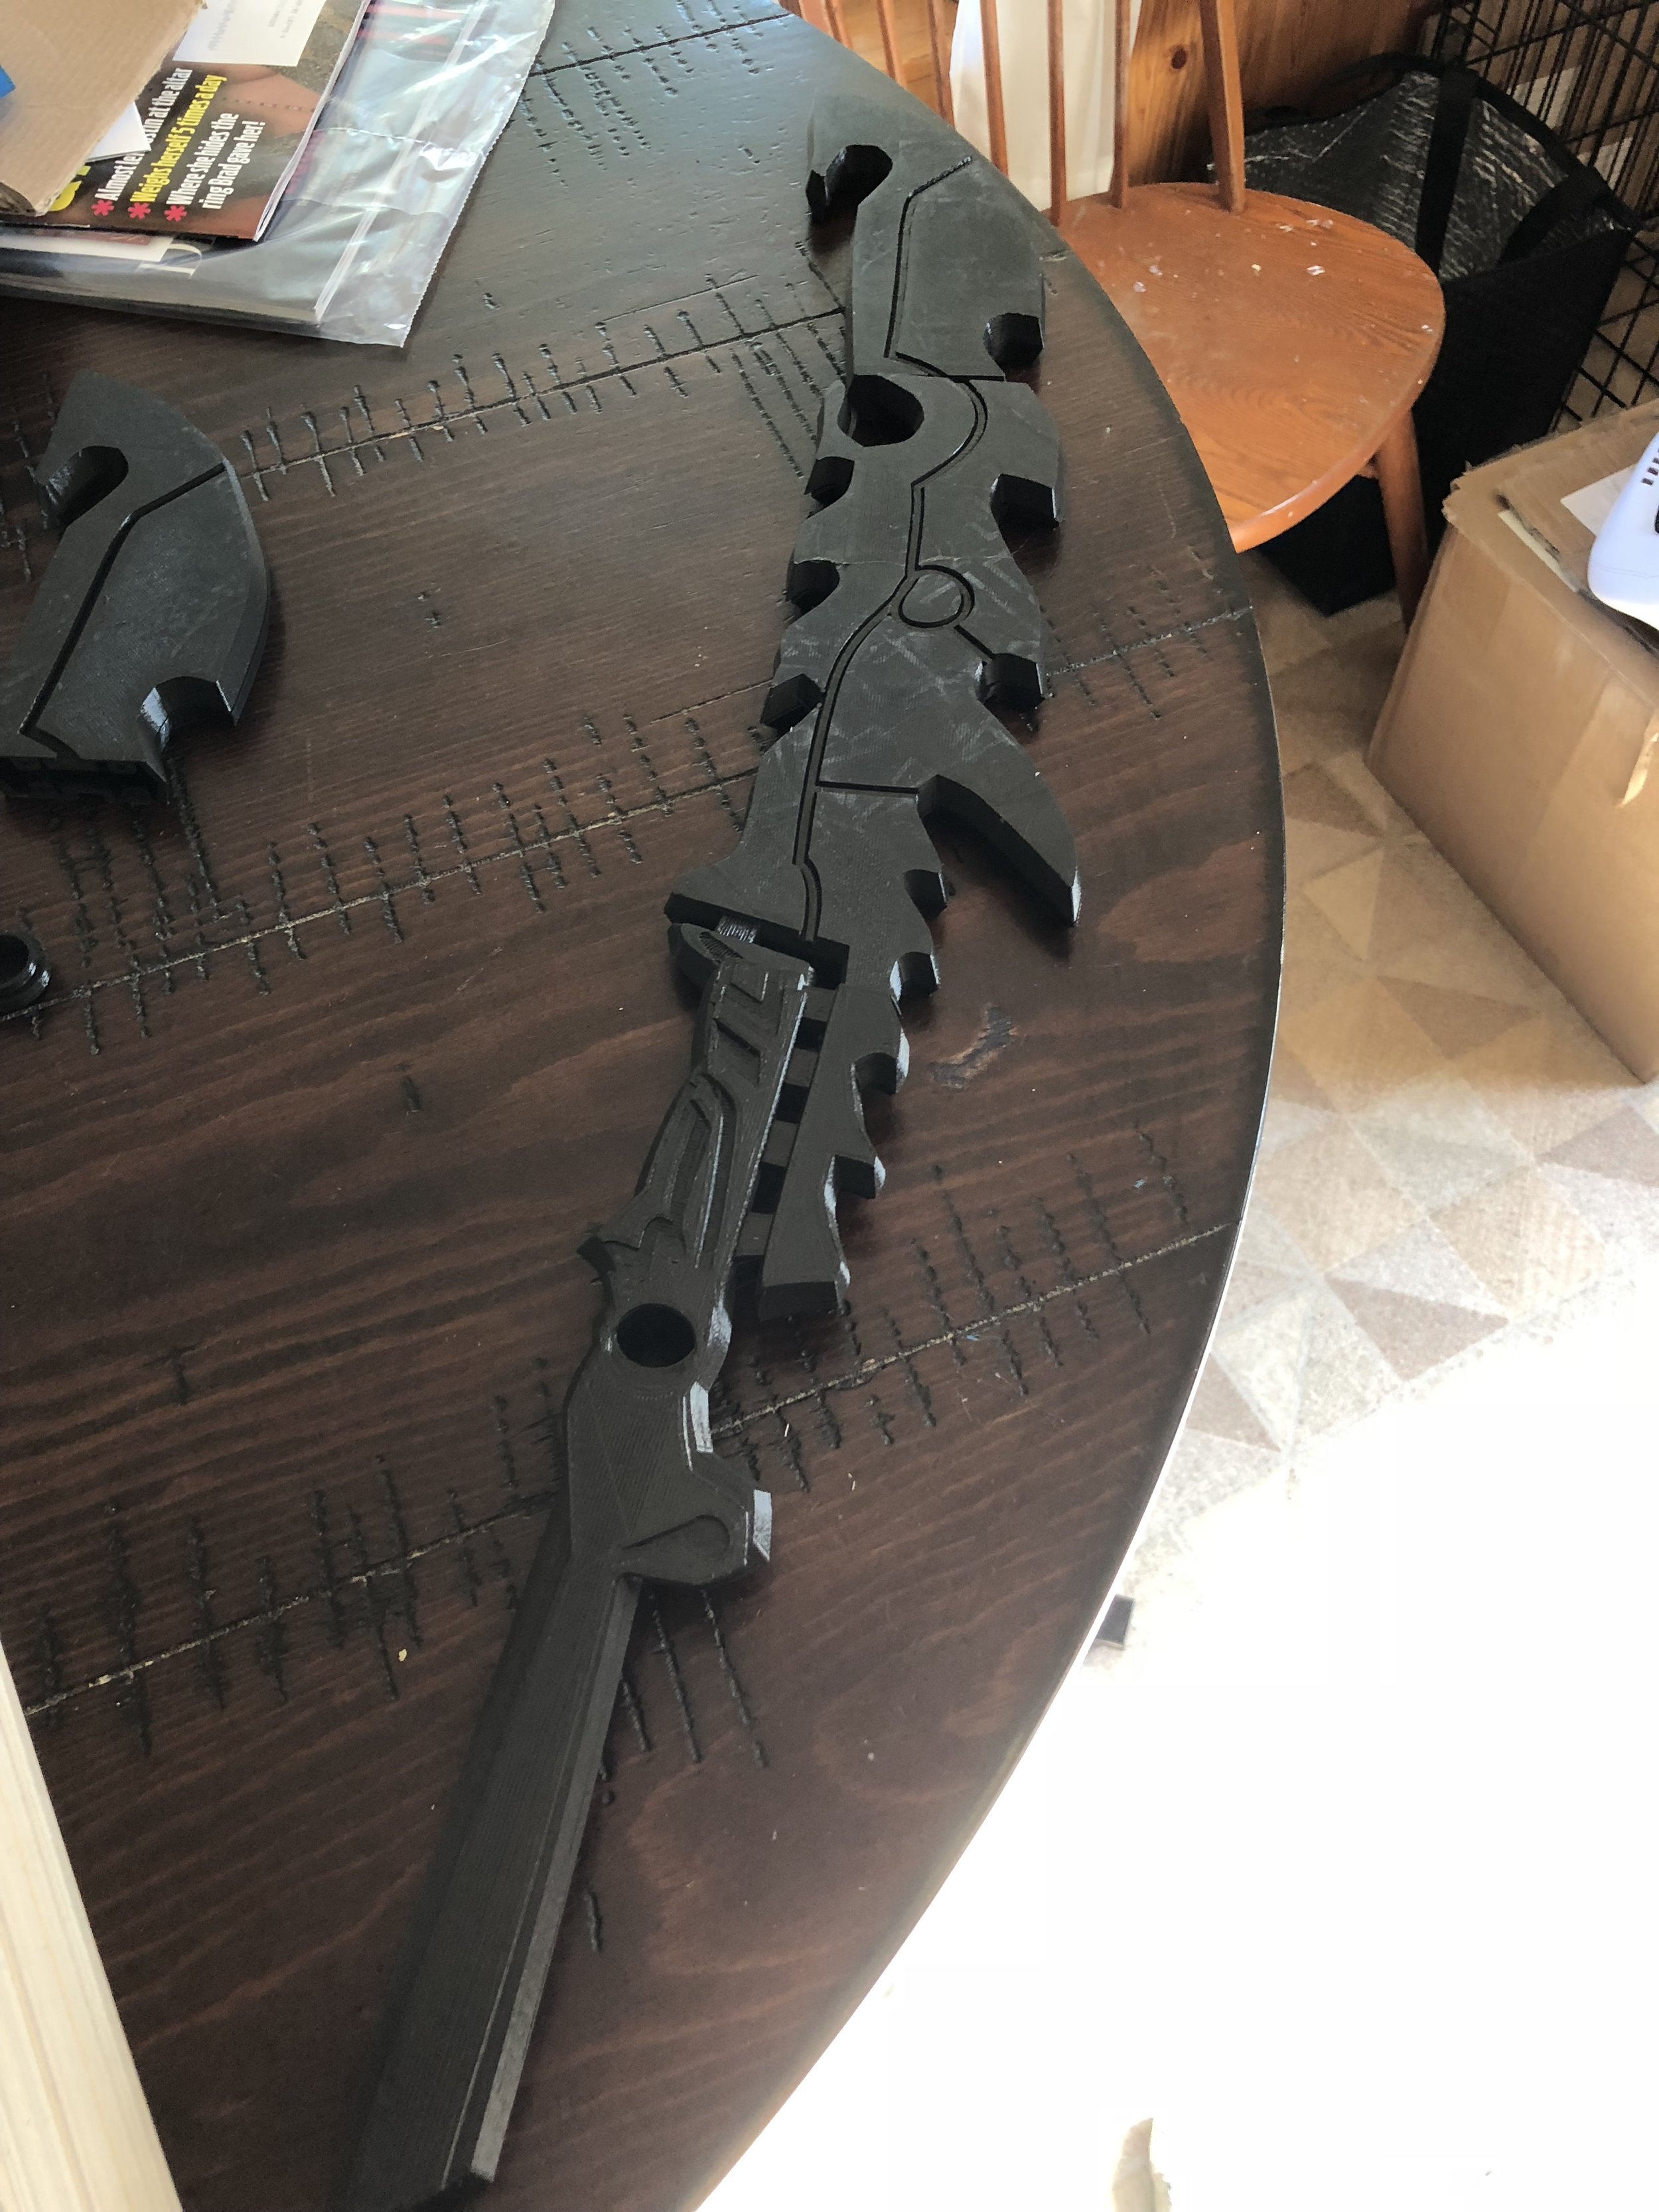
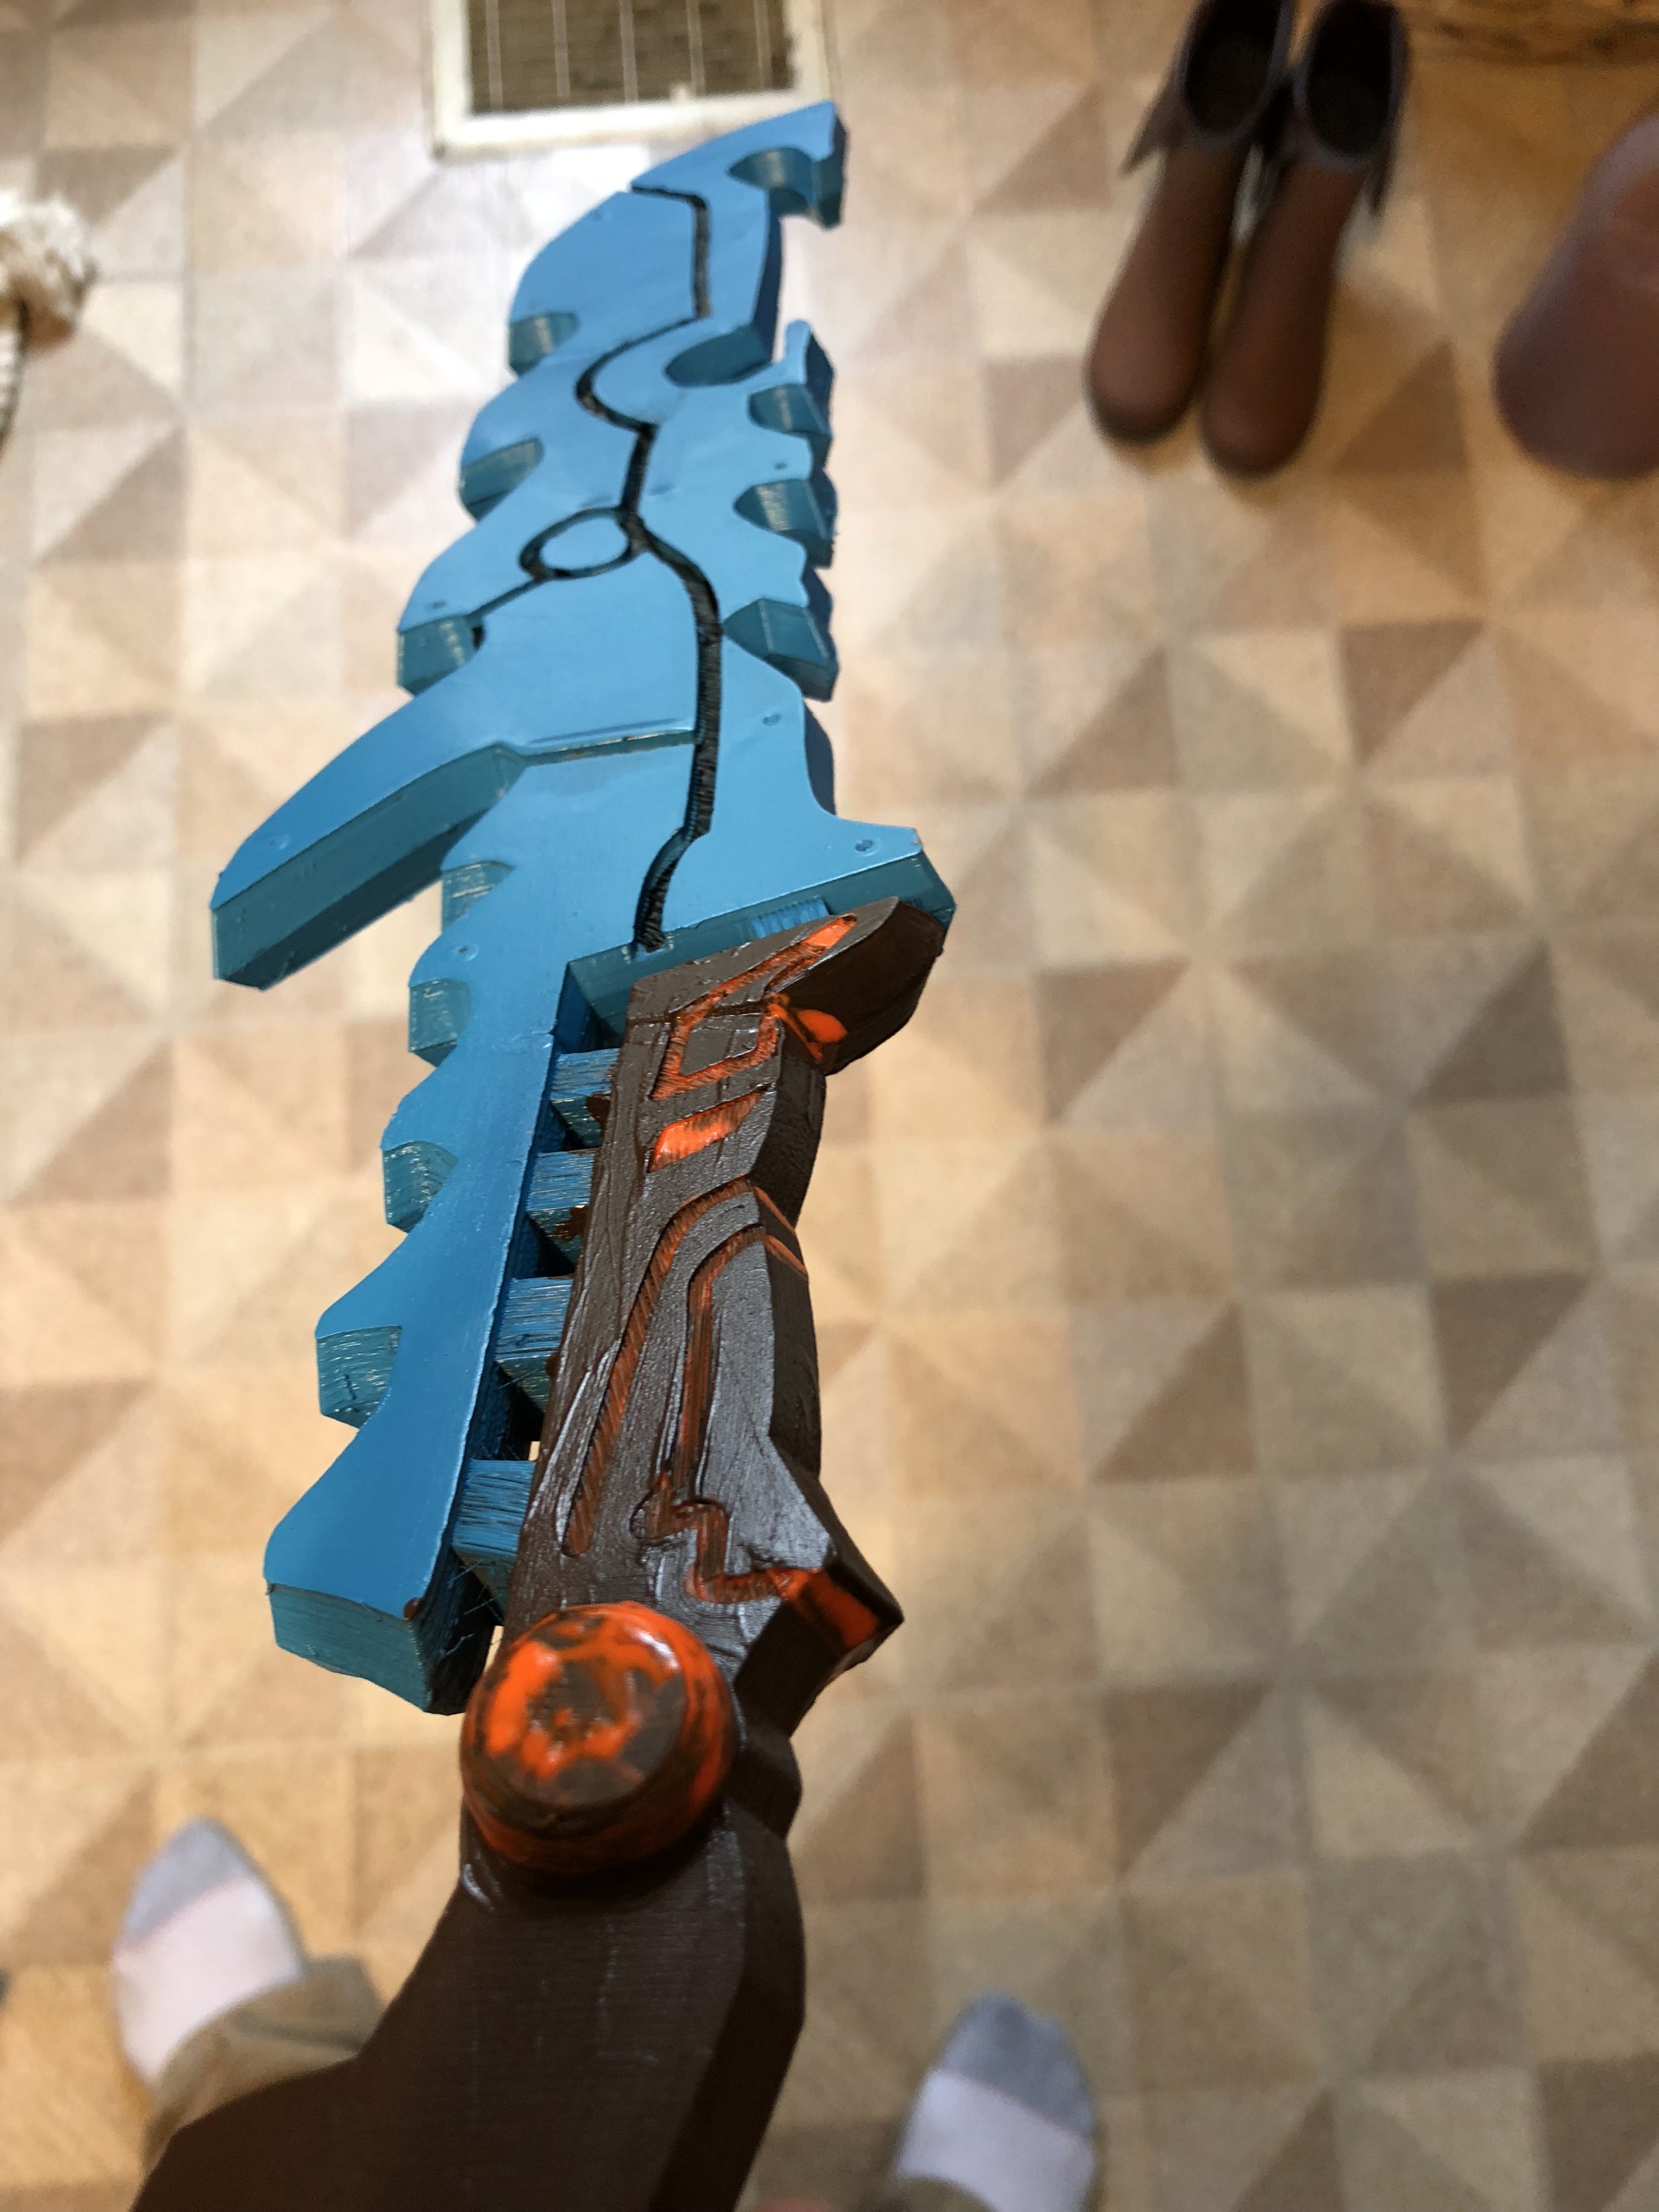
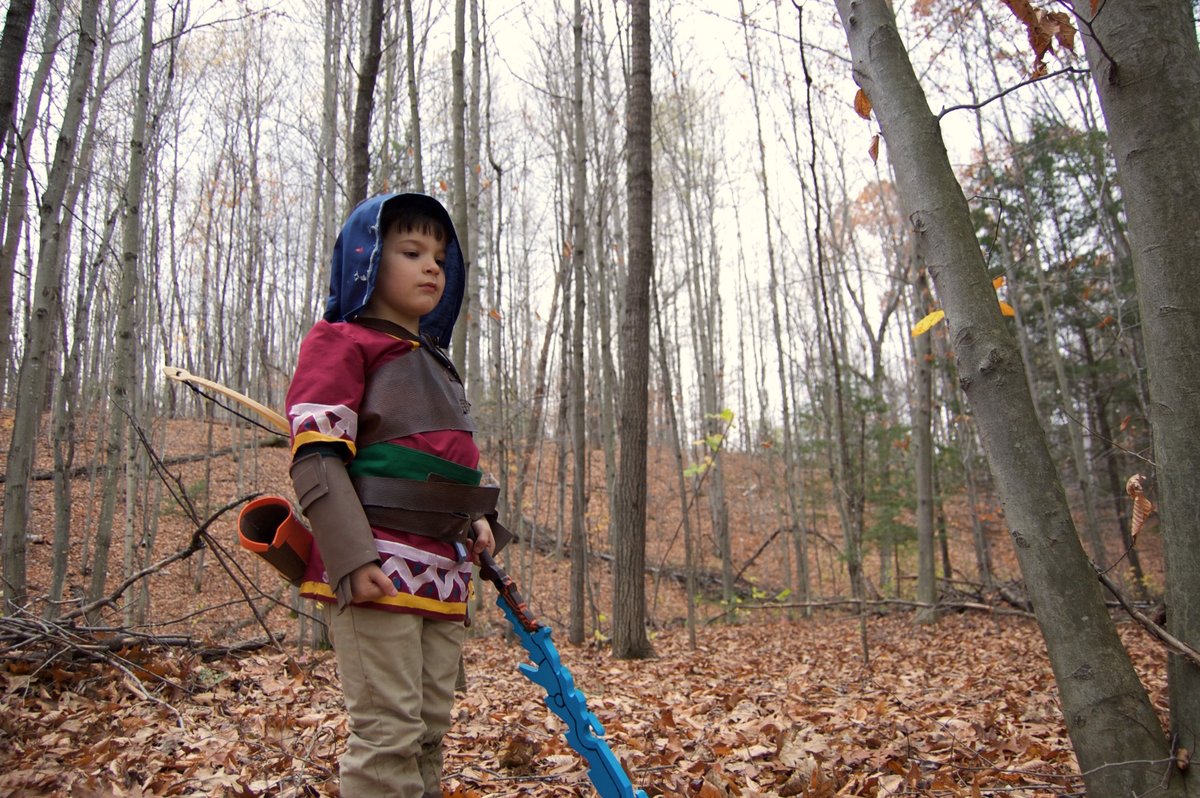
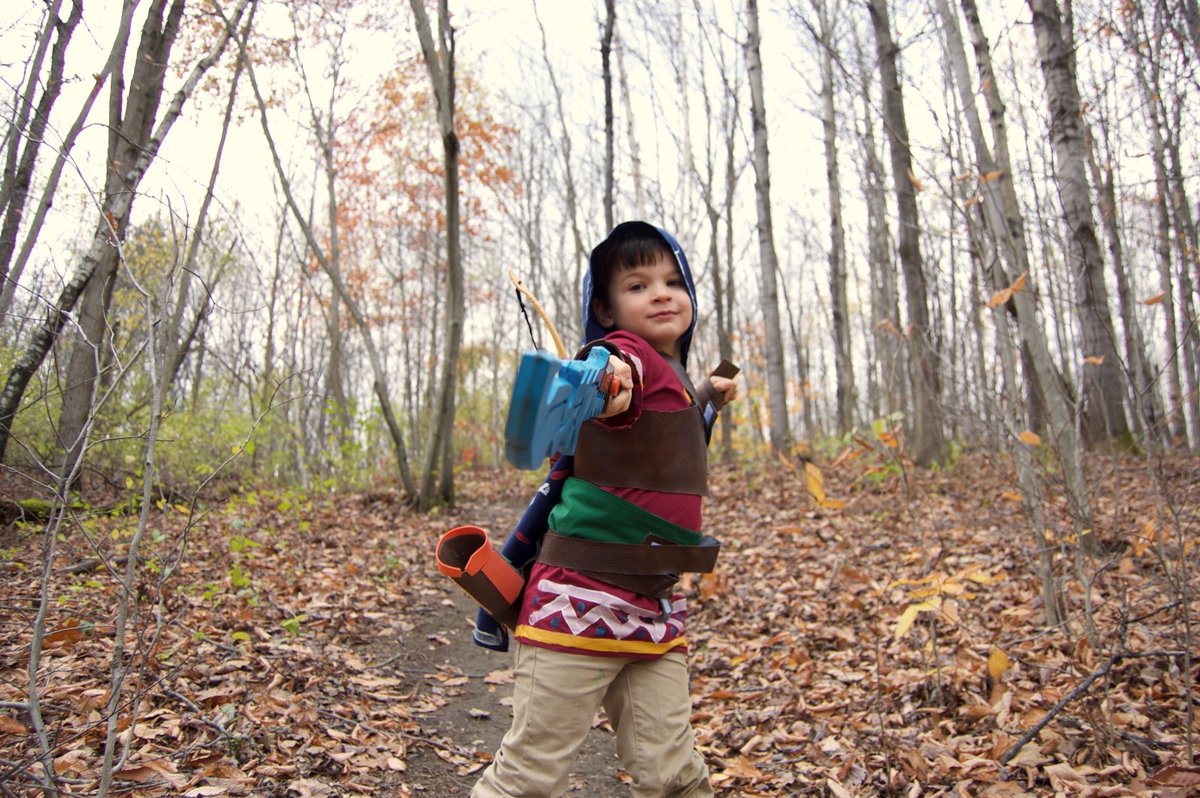
After that, I came across designs for one of the game's Guardian swords that you can pick up in the game. It's a lightsaber-like sword that has a really cool design to it: it's bright blue with a jagged edge. I sent the designs to a friend of mine, who 3D printed it (he has a bigger printer than the library) at 2/3rds scale. The handle is solid plastic, while the blade is hollow. I glued those together and gave it a similar paint job to that of the Sheikah Slate, as they're nominally from the same people. I ended up using spraypaint for the blade, to give it a consistent color, and hand-painted the handle.

IMG_0761

It's not perfect, but it came out nicely.

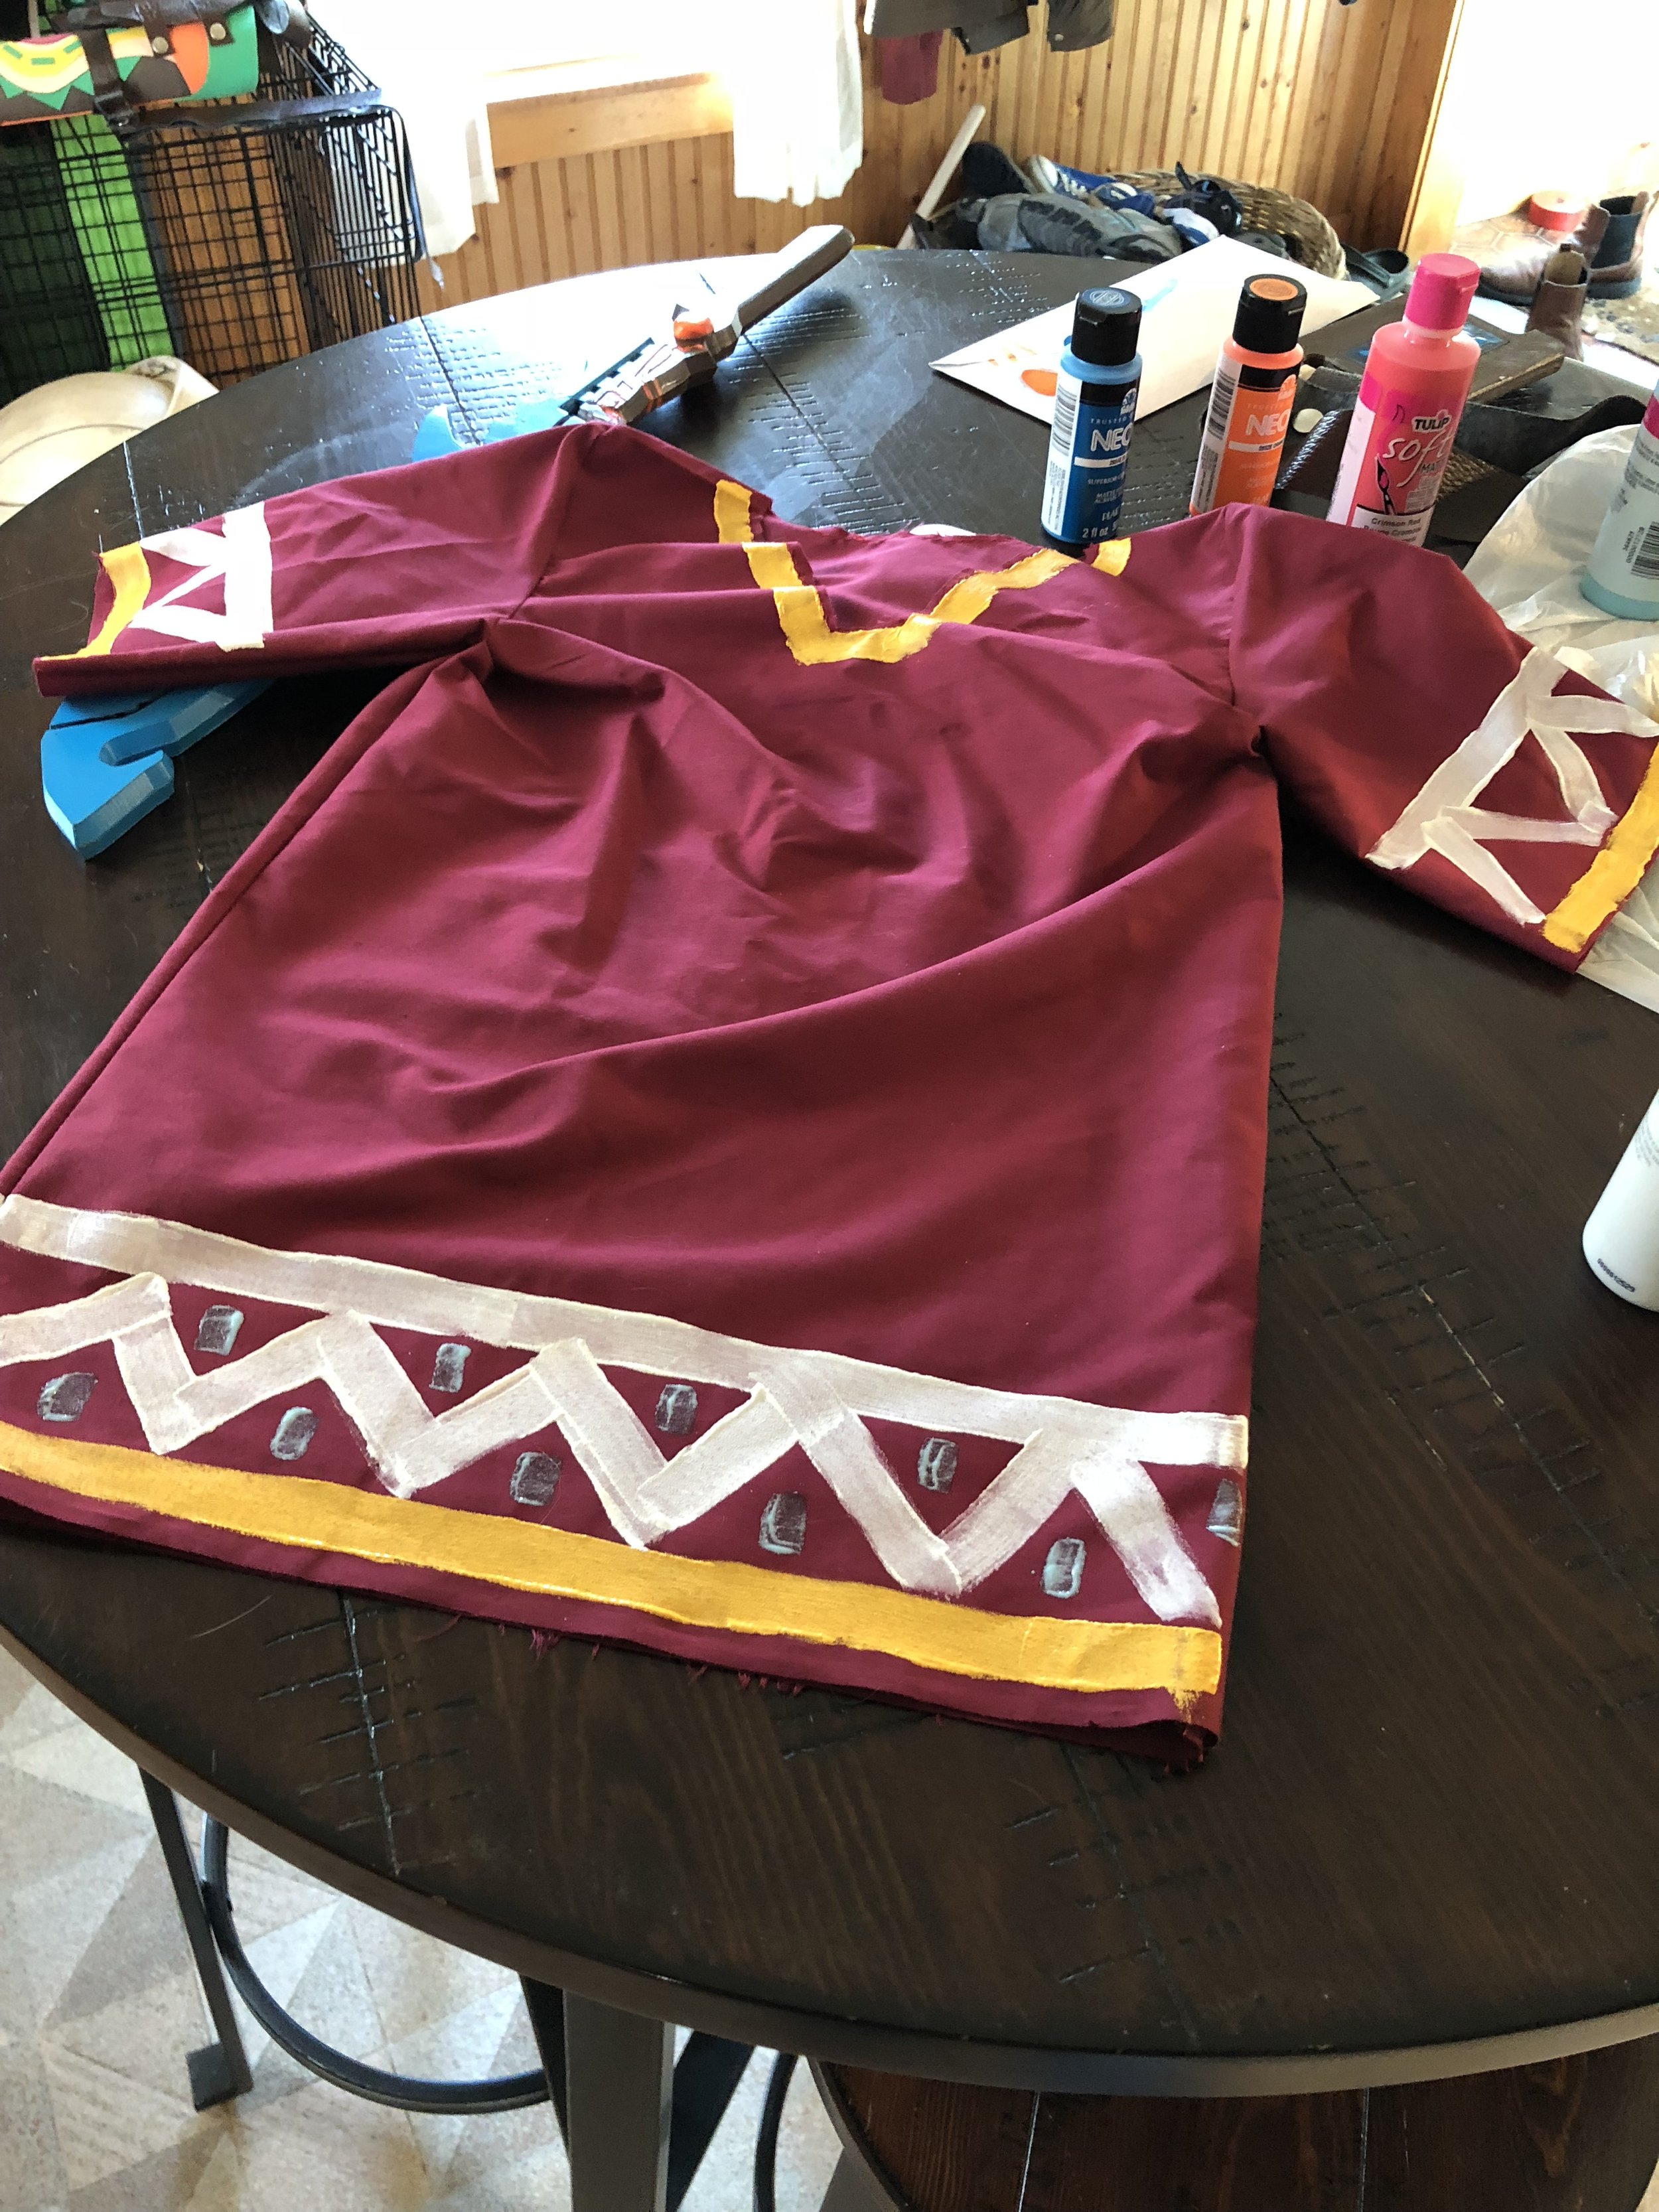
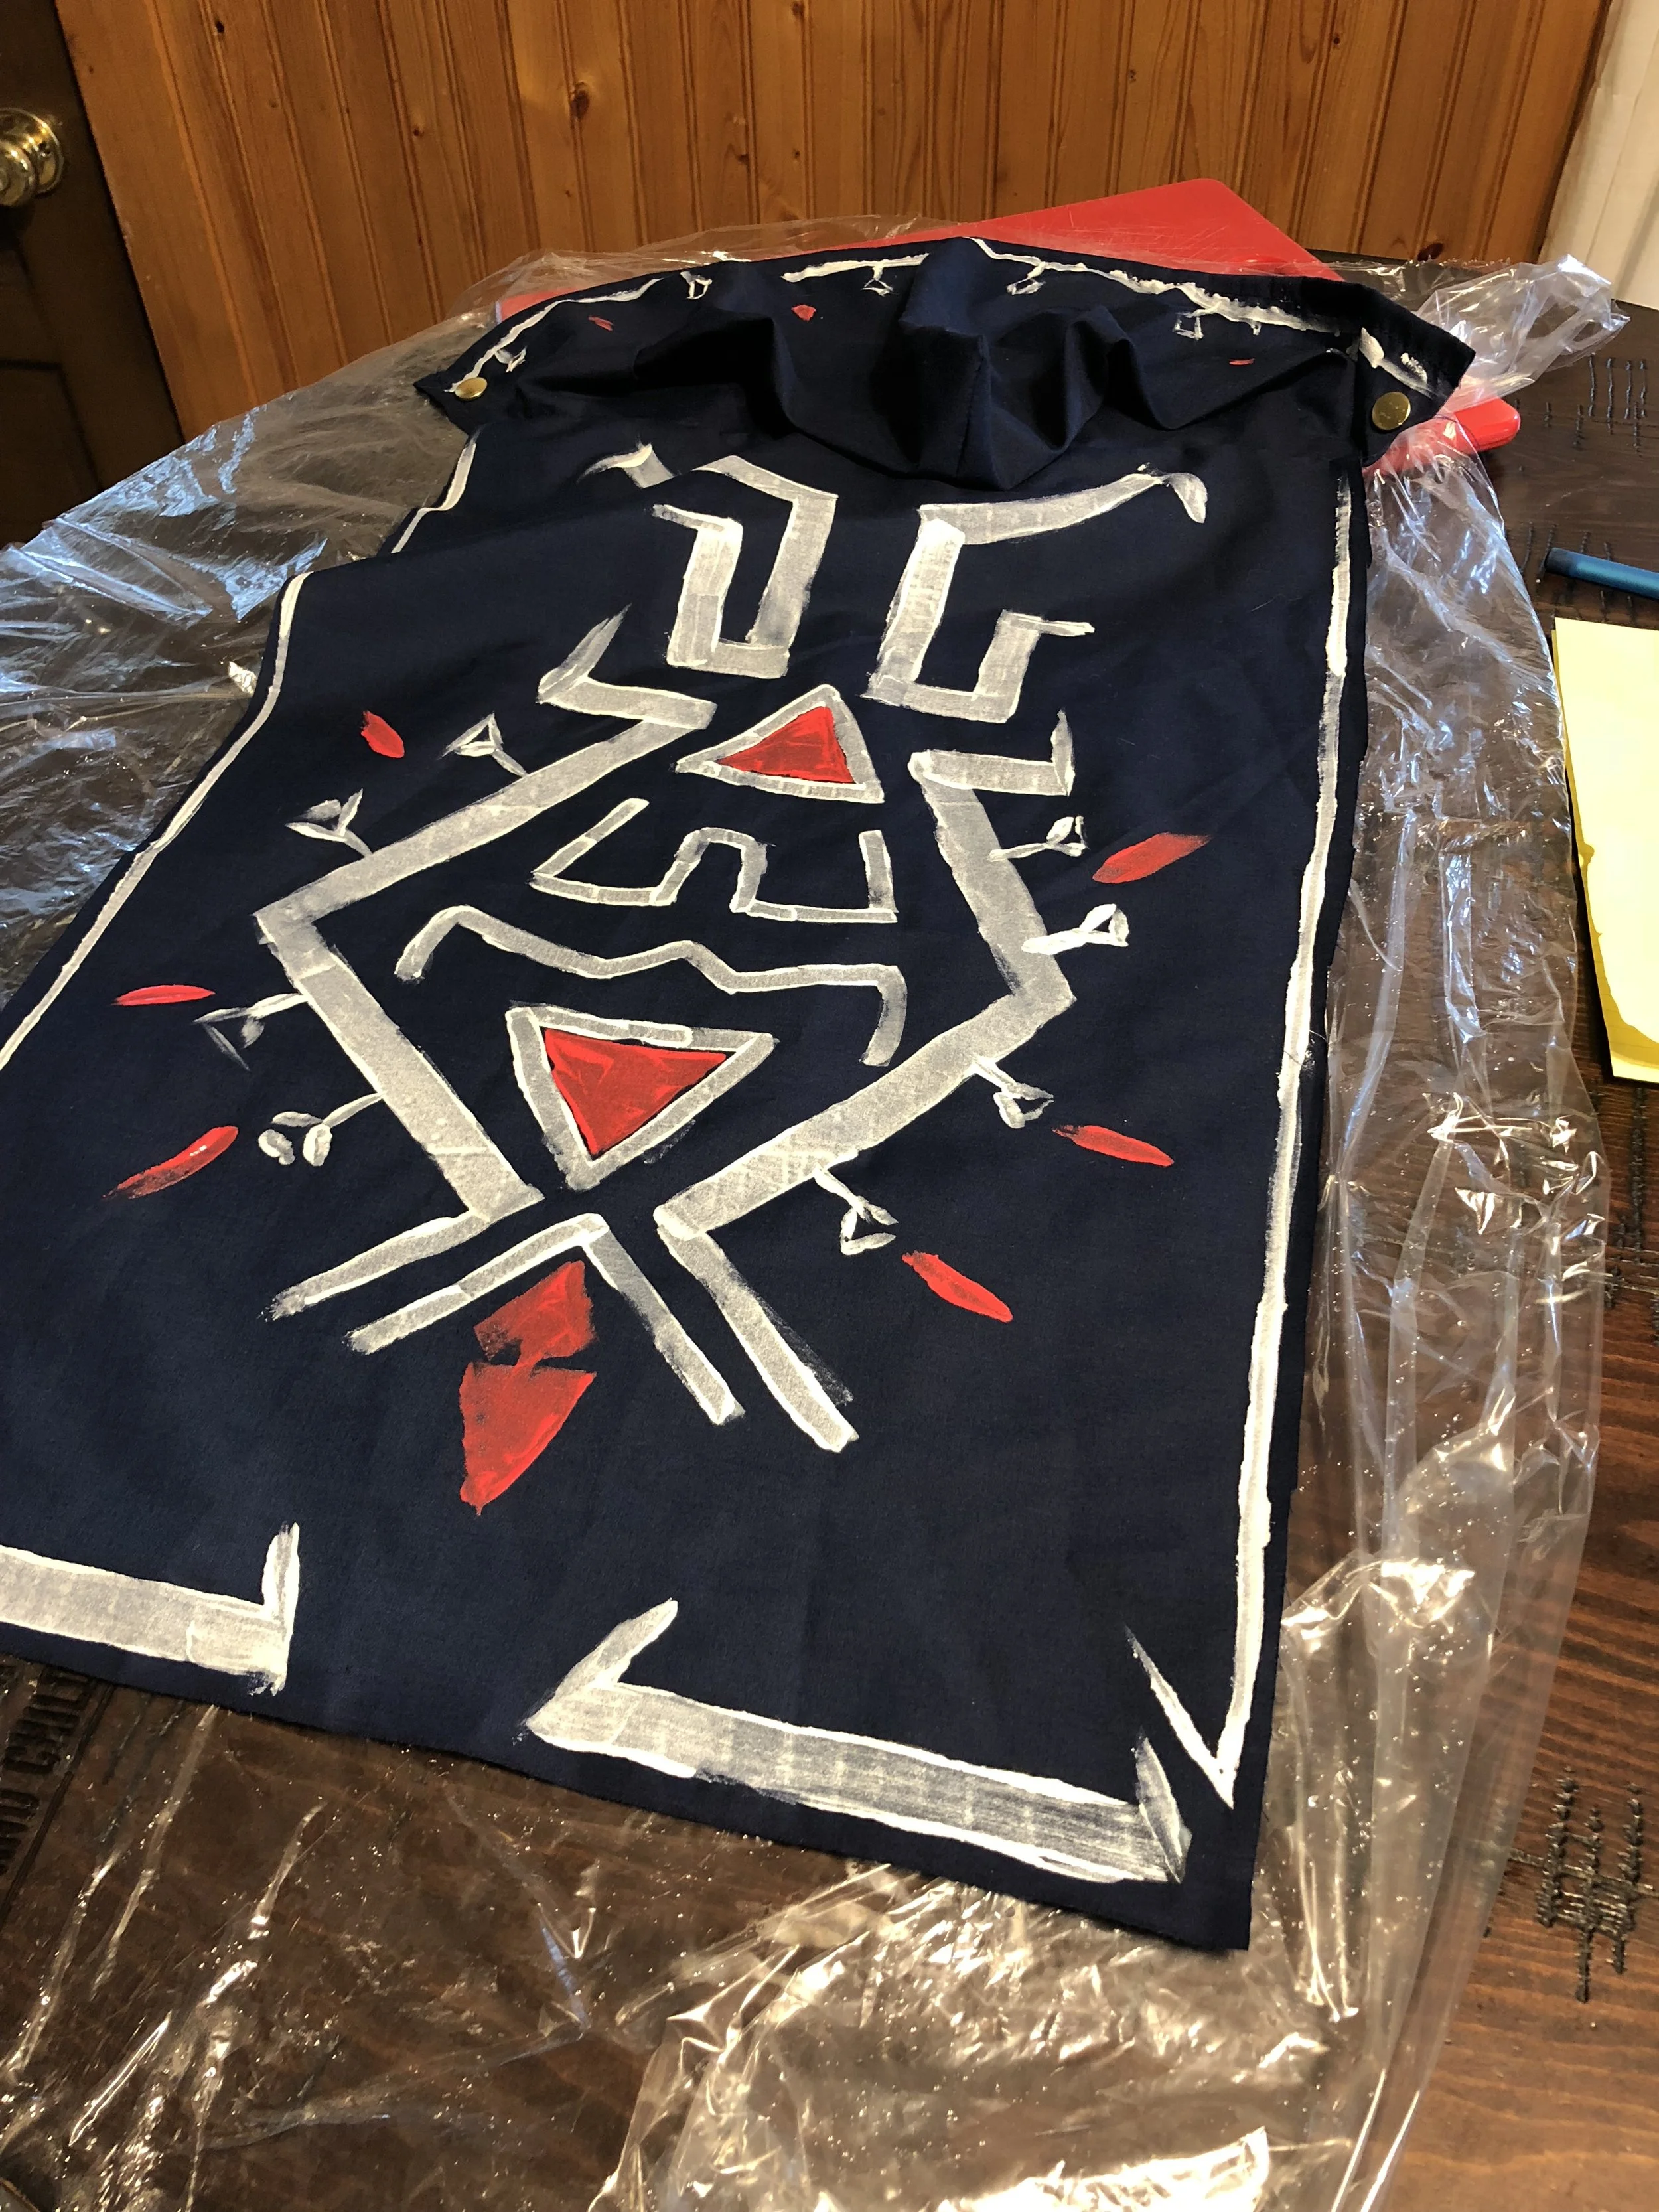
After those parts were done, I turned to the cloth parts. Some were easy to source: I picked up a set of tan pants from the store, and a light, solid-colored shirt that I then dyed the right color green, the two base garments for the outfit. My mother sewed together the tunic that Link wears over that green shirt, as well as the blue cape and hood, and the green cloth belt. Once those were on and trimmed a bit, I wanted to add some more detail to the shirt and cape. I bought some fabric paint, and hand-painted the details directly onto the garments. It wasn't exact, but they came out decently enough.


Along the way, I was putting together the other details. I found a roll of brown marine vinyl on sale, and used that for the leather elements: a chest harness and trio of belts. I had Bram lie down on the vinyl, and roughly sketched out the chest harness, and trimmed it to fit. I hammered a couple of snaps onto it to hold it in place, and added some velcro for extra security. The belts were easy: we just measured and trimmed them out. I used some extra snaps to fashion a loop for the Sheikah Slate, and some snaps on the cross-chest belt to hold the plastic bow that I picked up at Walmart.

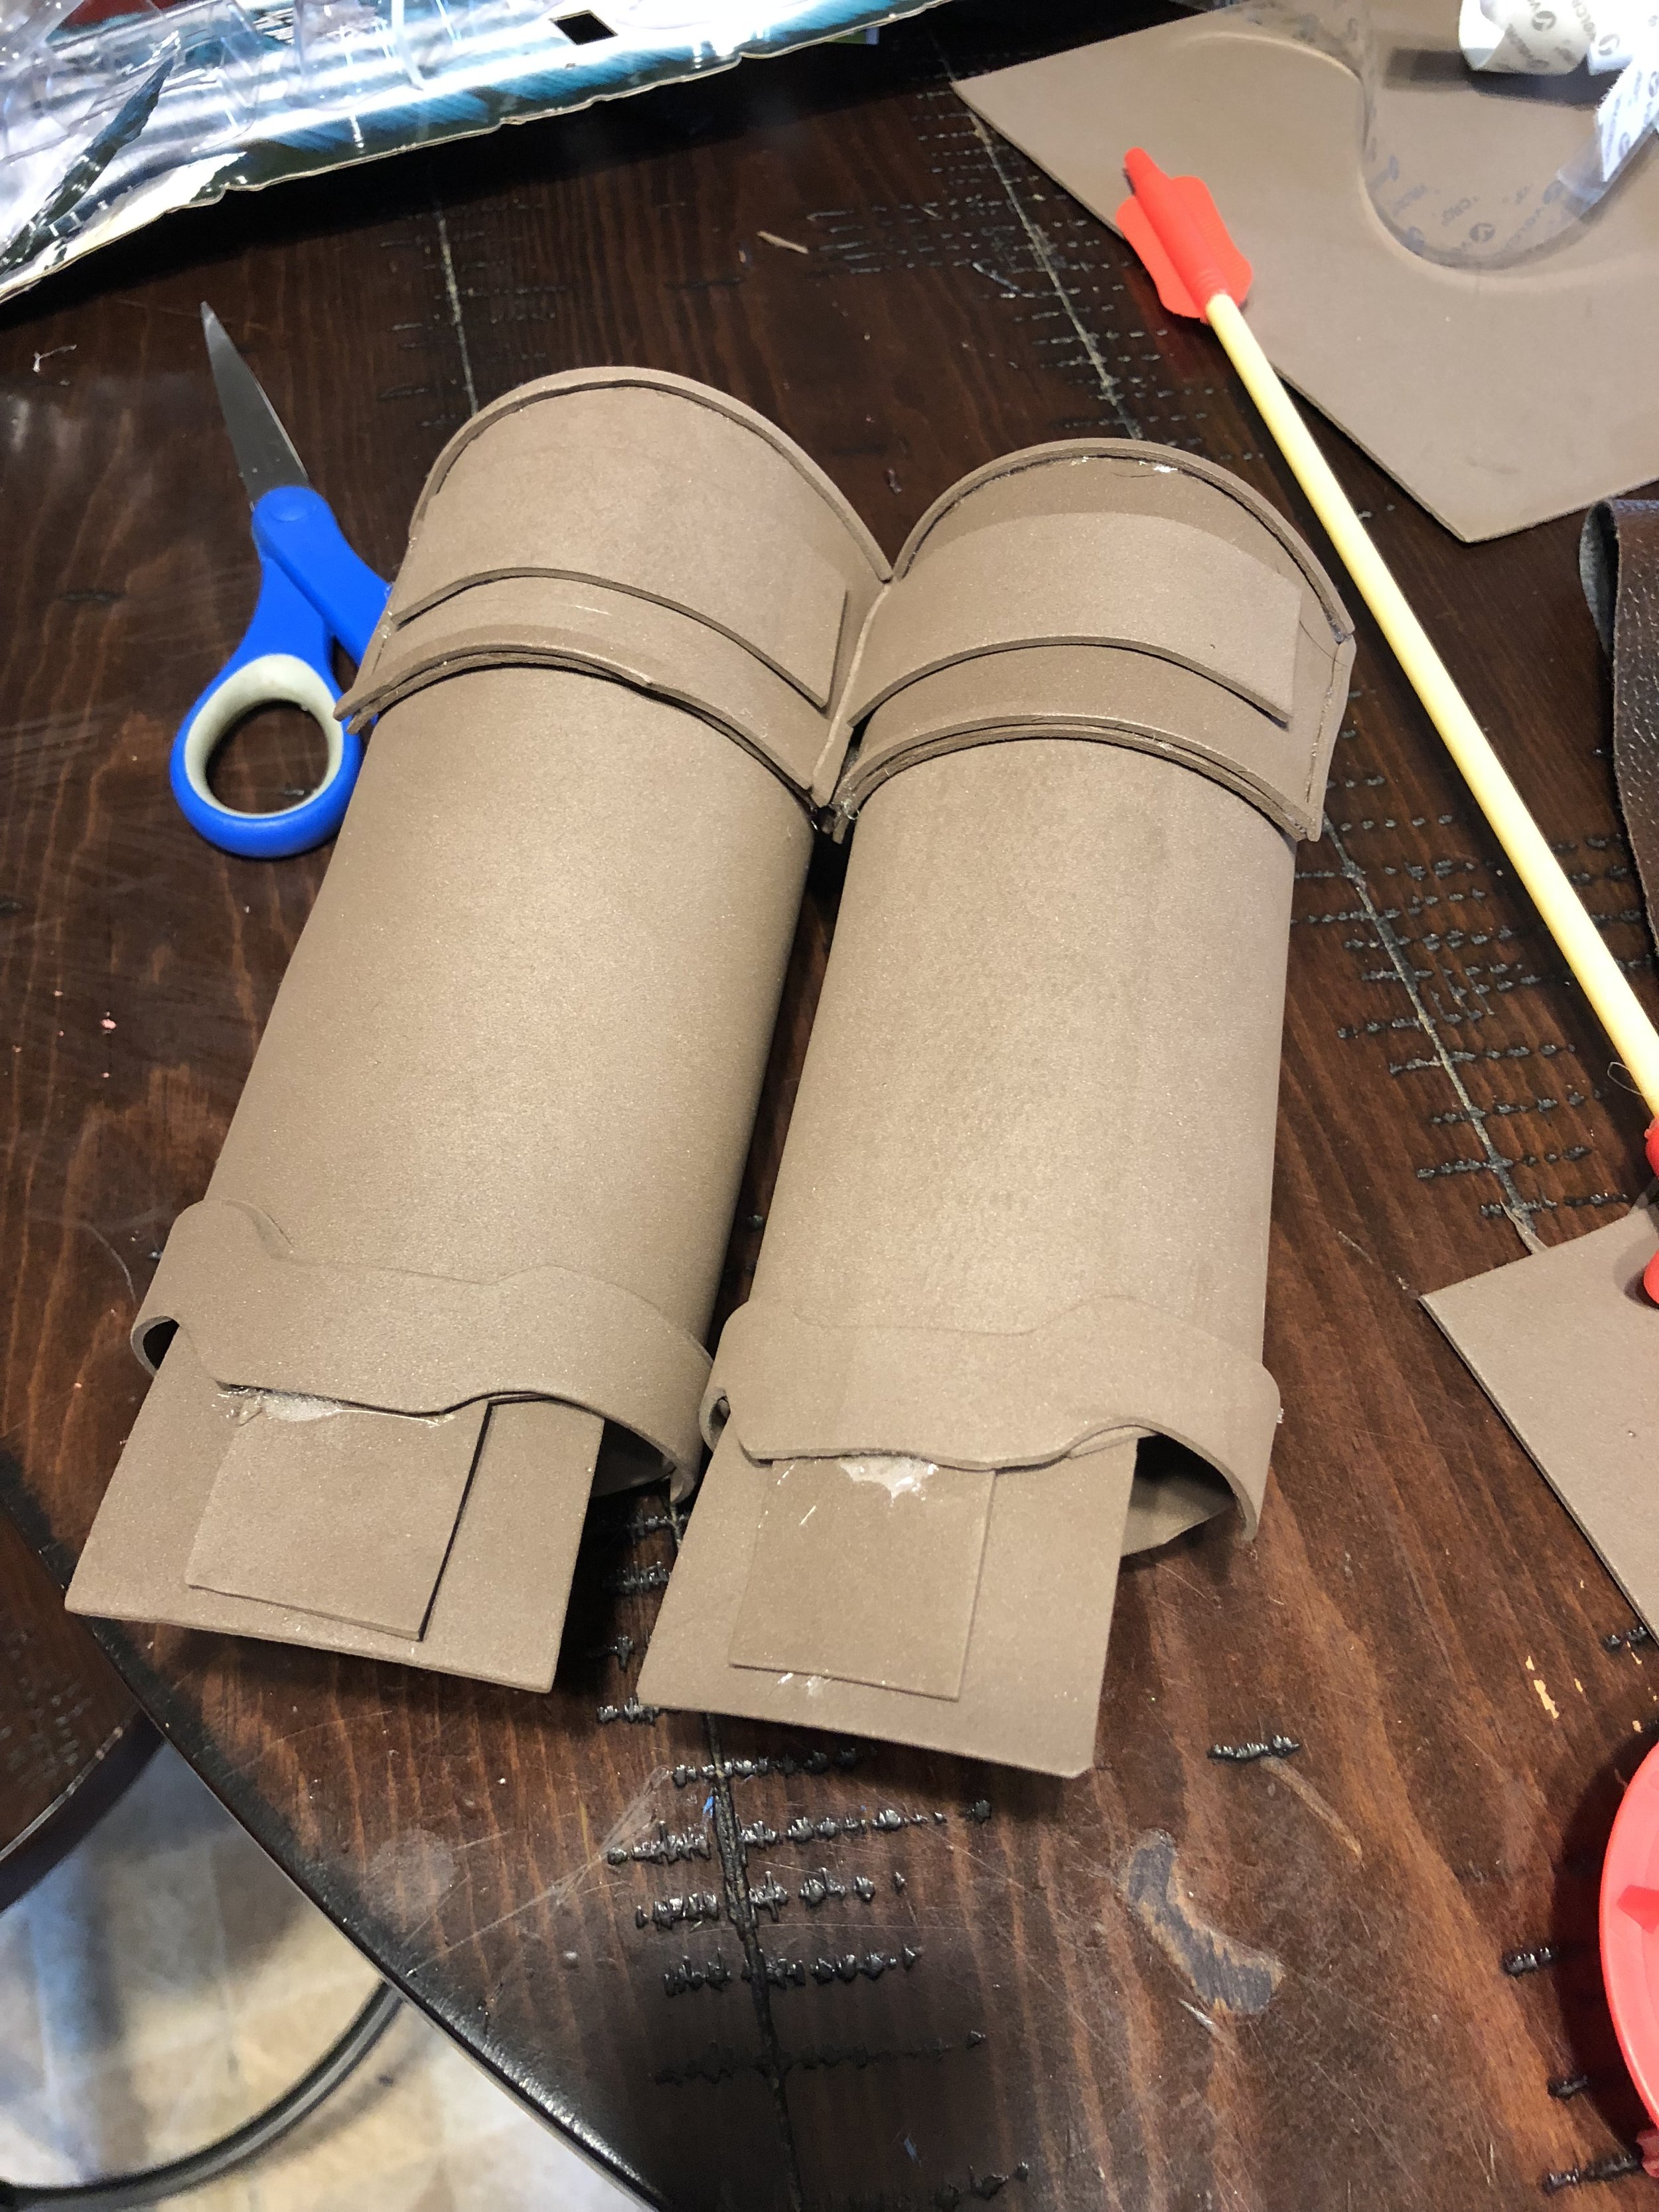
Next up was the forearm bracers. Bram ended up ditching these a couple of times on Halloween, but they're useful pieces. I bought some craft foam, which I fitted to Bram and cut out some rough details to glue on. I used Velcro to secure them, although they can easily slide on and off as needed.


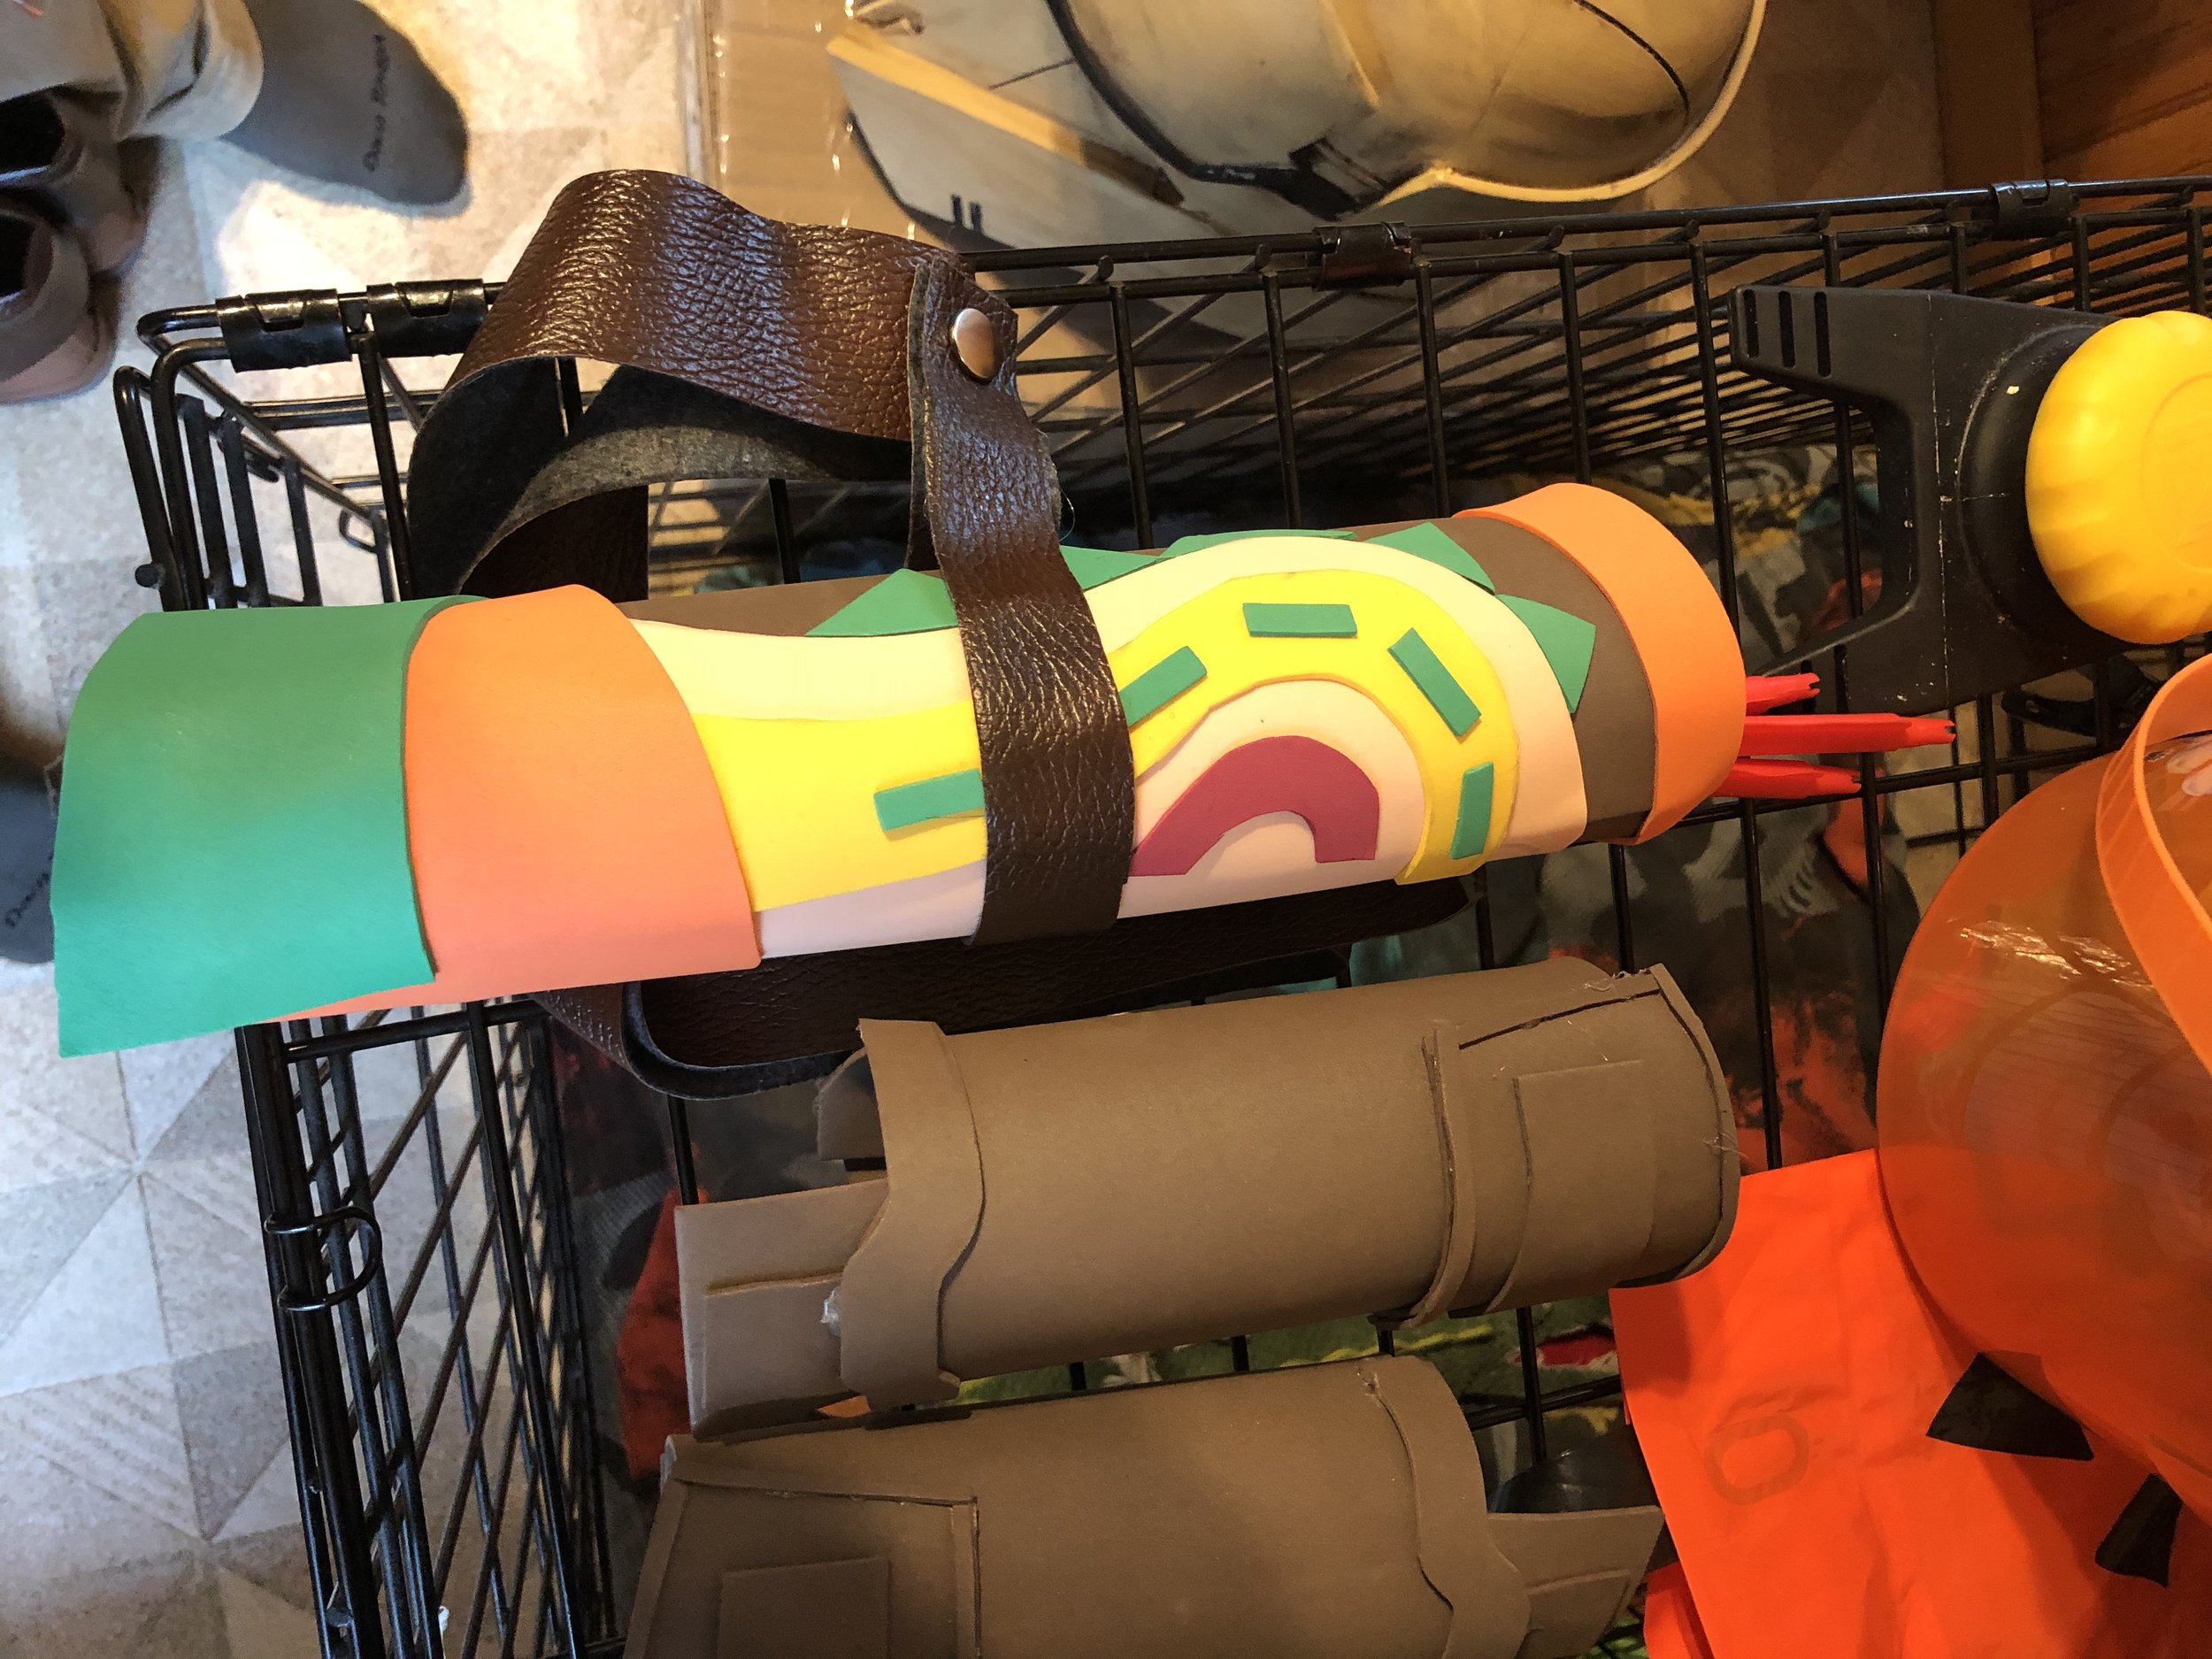
The other big foam project was the quiver for the arrows. This is a pretty detailed piece, and I originally thought about painting up a mailing tube or something. I ended up finding a pack of craft foam with adhesive backing: that made it super easy, because I could just cut out the right details, and apply them directly to the foam tube I made. A bit of vinyl wrapped around the middle and attached directly to the belt. I should have done two straps, because it swung around a lot, but it worked okay.

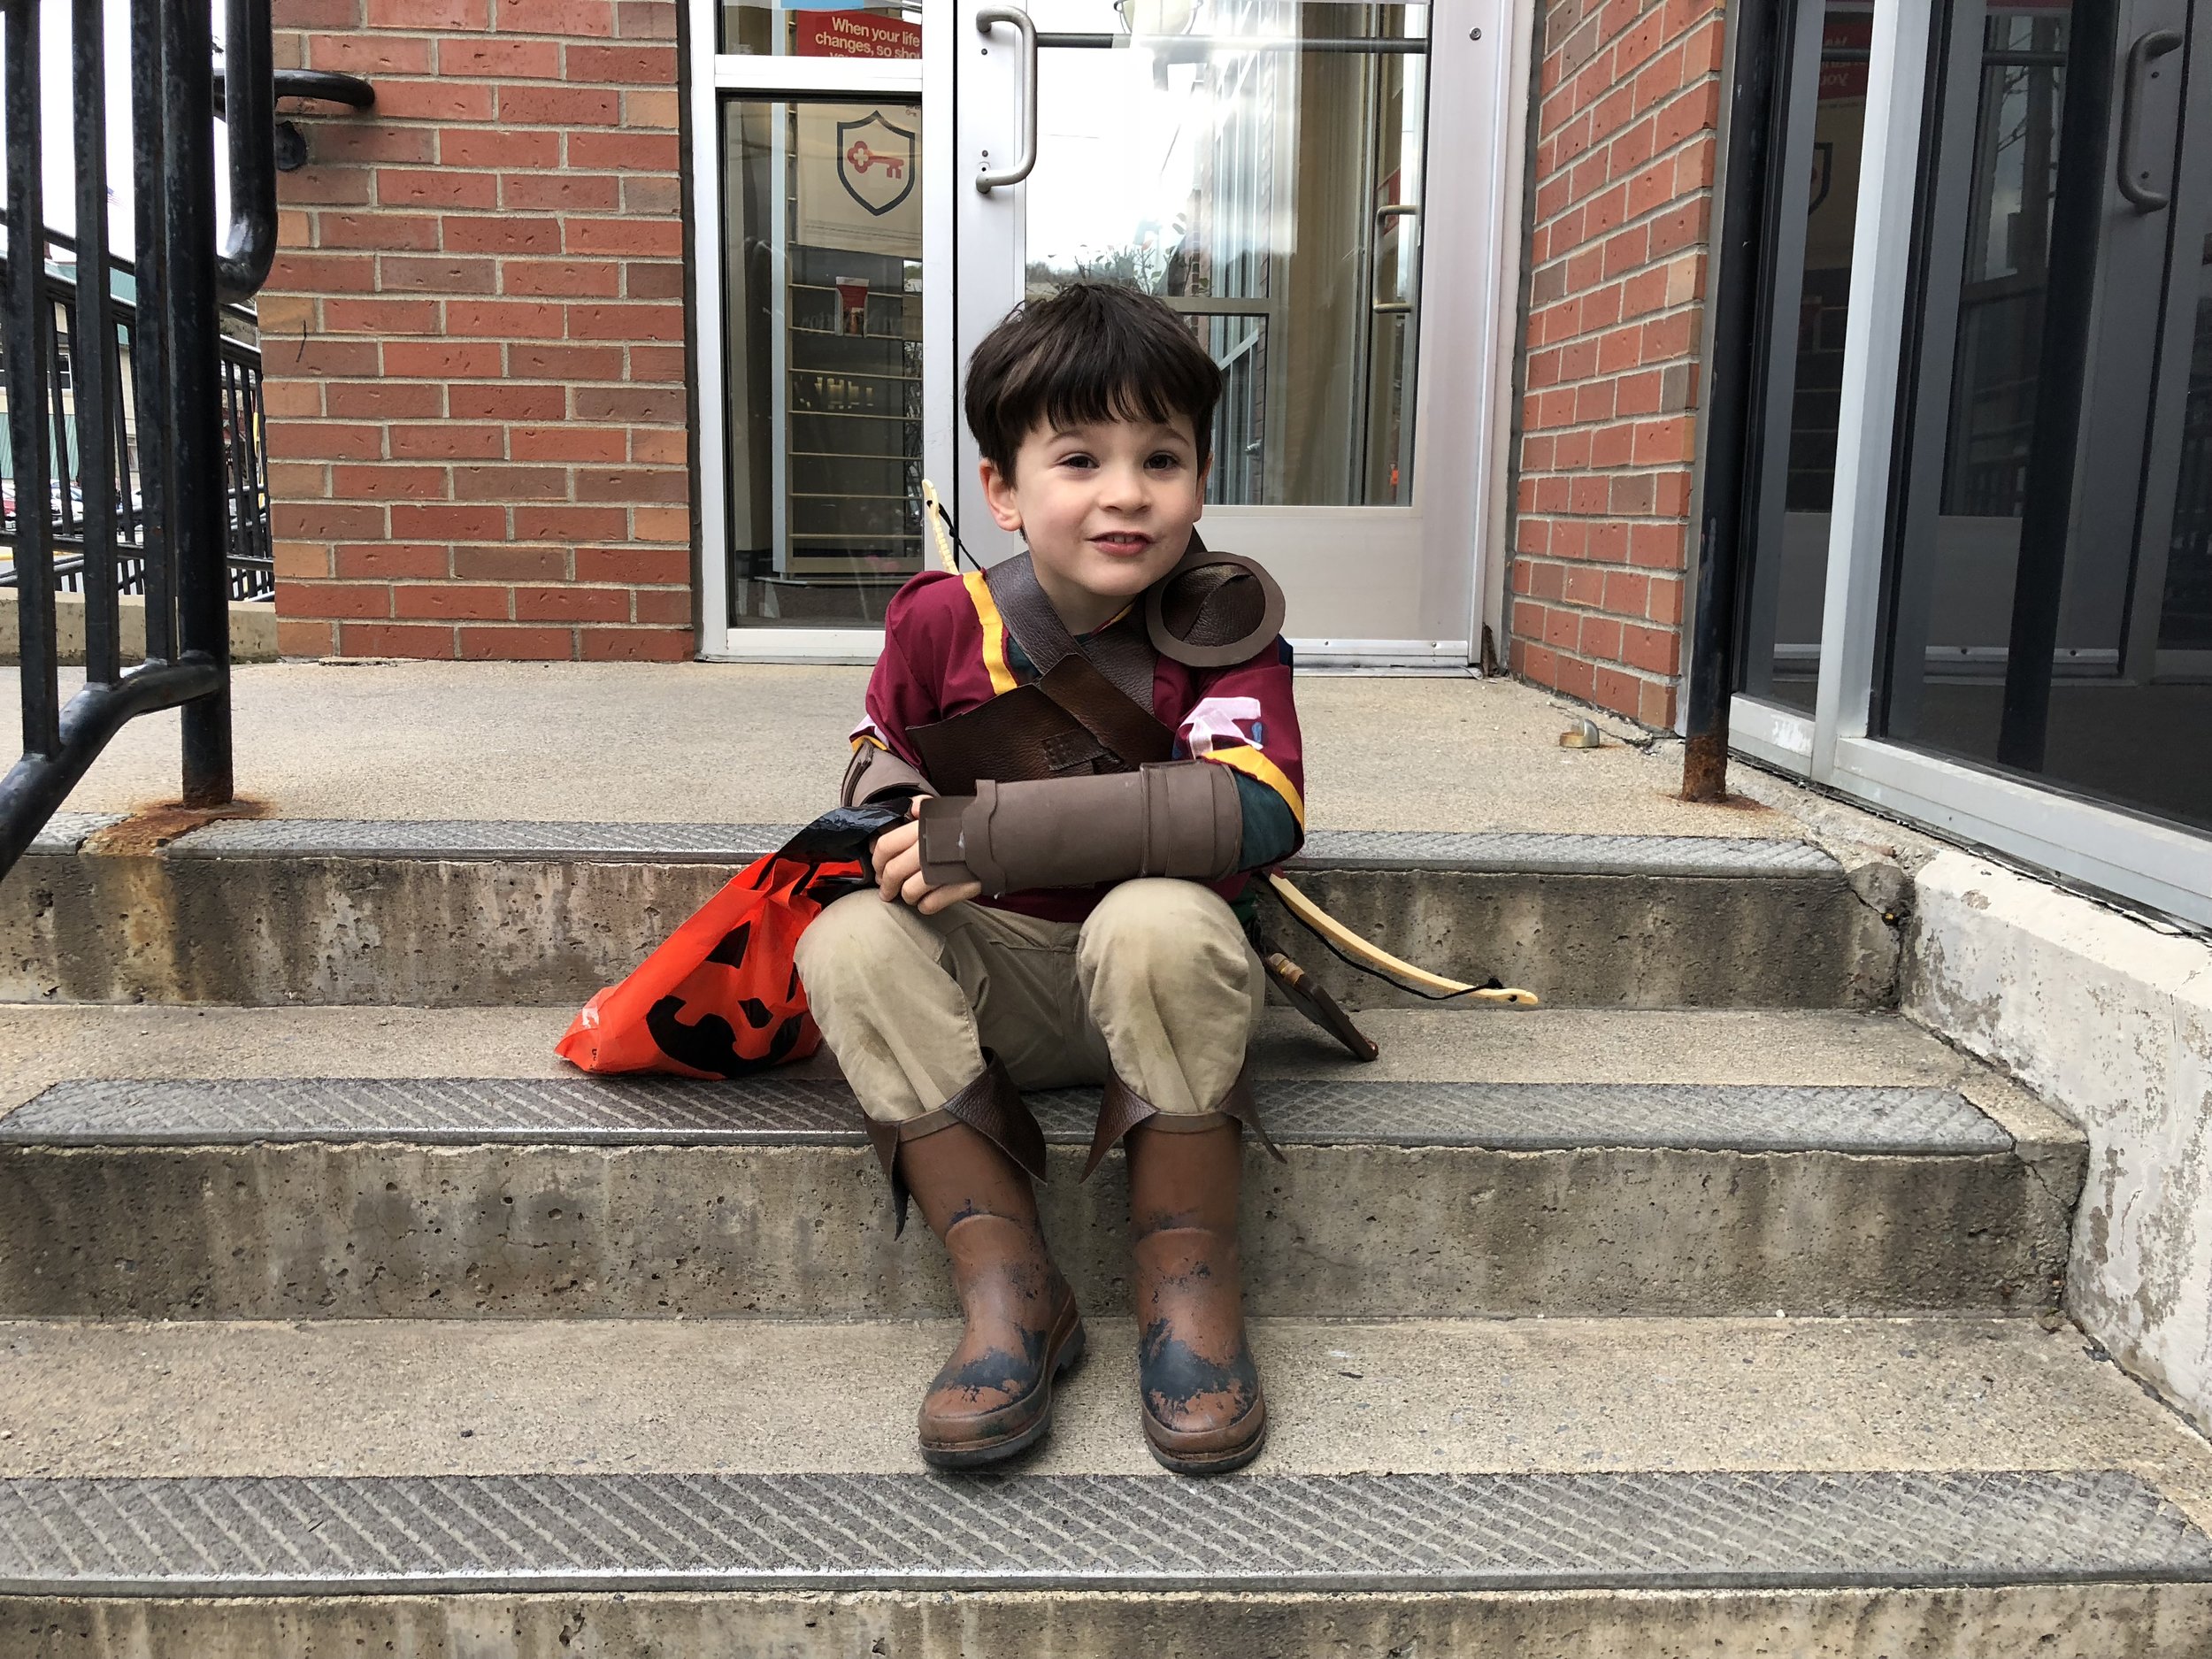
Lastly, we took a pair of mud boots that Bram recently wore out. I took some vinyl and glued it around the top, and folded it over around the edges. I spray-painted primer onto the boots and then covered that with a brown acrylic paint. That ended up flaking off after he wore them a couple of times, but for the most part, they looked okay.

The last thing I put together was the weird shoulder pad. I measured out a circle in my remaining piece of craft foam, and cut it in half, gluing the two edges together so that they were a weird dome. I did the same thing with a piece of vinyl, and glued that onto the foam. I then sketched out a ring of craft foam that I then glued onto the dome. I then secured it to Bram's shoulder with some velcro.


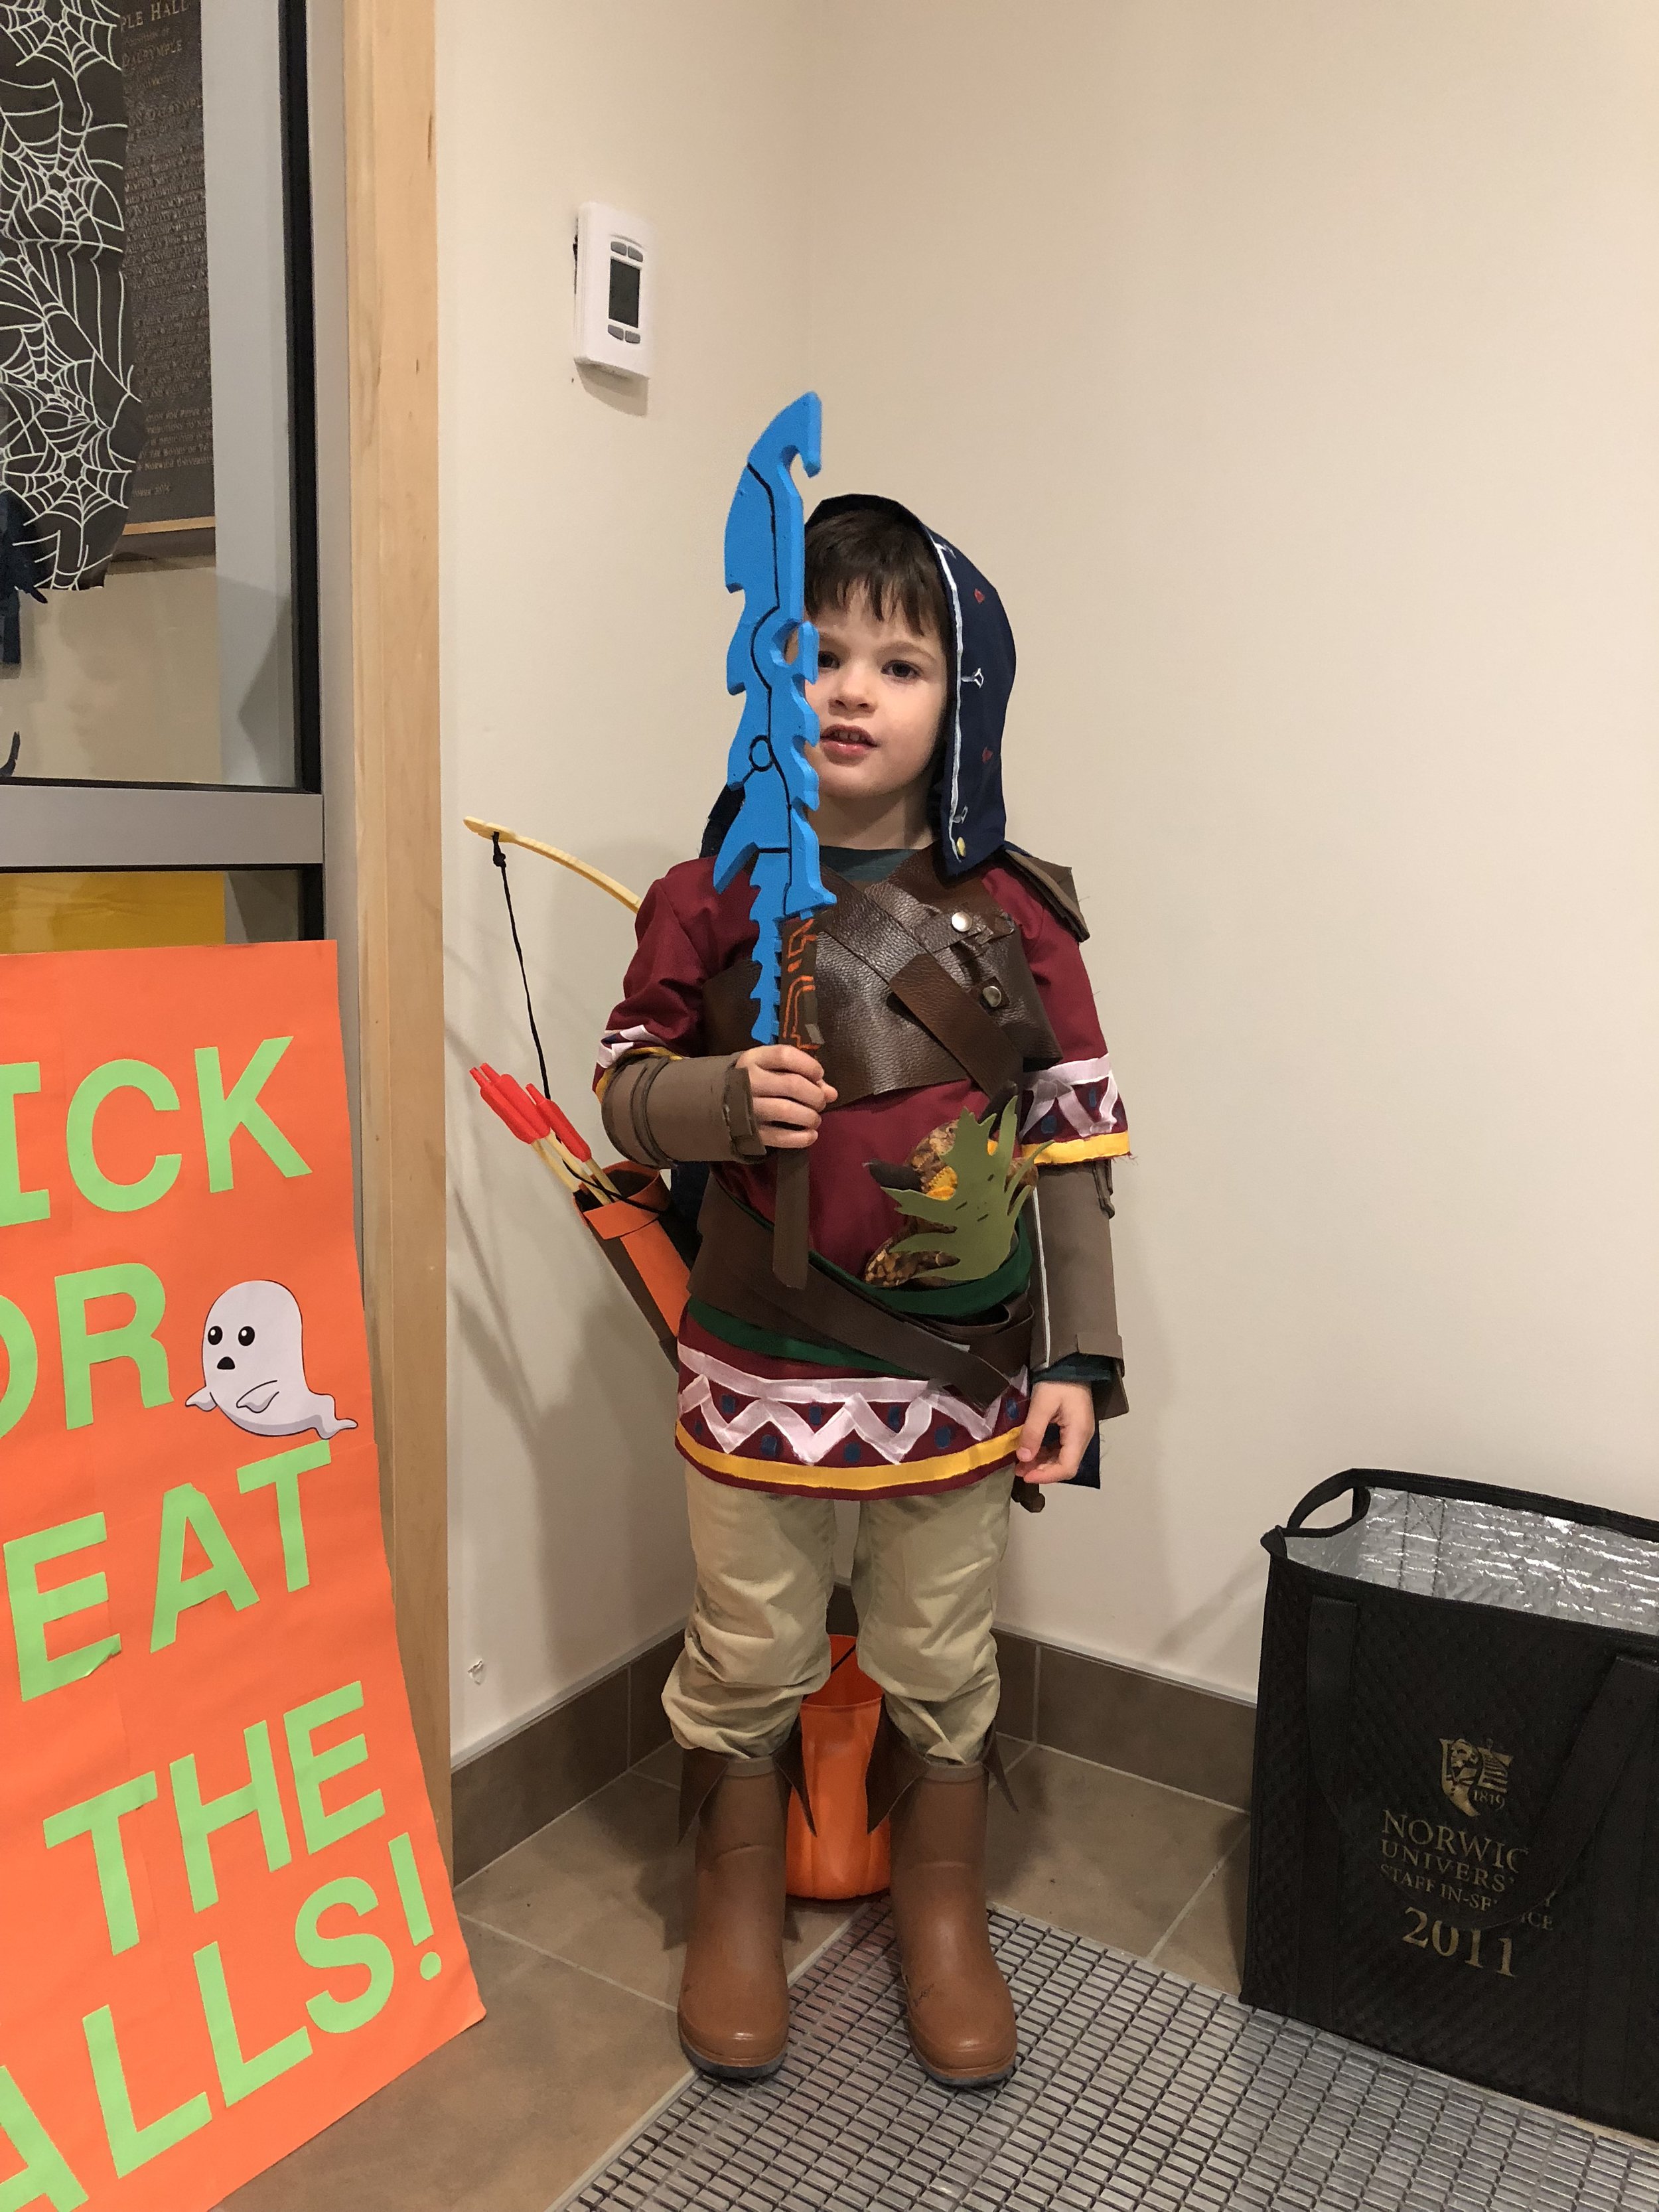
After that, it was done, and when it all came together, it looked pretty good! We ended up taking the costume out to a couple of places: Trick-or-treating at Norwich University the week before Halloween, a Halloween train in Burlington, to daycare and trick-or-treating on Halloween itself. We got a lot of compliments on it — some people recognized it, but others thought he was an archer or Robin Hood. But the best compliment came from Bram, who declared that it was his most favorite costume, and that he wanted to wear it for "a thousand years."

I took him up into the woods near our house for a couple of Hyrule-style pictures:

DNf8rZyW4AArd16

DNf8yM1WsAAifuf

All in all, it was an extremely rewarding costume to put together. It was a complicated costume with a lot of different parts, most of which I usually don't work with. But more than that, it was a costume with a bit of emotion sunk into it: we both love playing this game, and it's been something we've bonded over. Seeing Bram go into the woods and pretend to be Link is a moment that I won't forget. I'm sad that he'll eventually grow out of it, but I'm sure that we'll figure out some sort of costume for next year that will be just as much fun to assemble. I can't wait to see what it is.

Vermont's Green Mountain Squad

14352146_1074085316038291_788422084109068981_o  

Let me tell you about one person: Scott Allen.

When I was in High School, I was obsessed with Star Wars. I'd read the books, watched the movies, and chatted about everything on internet forums such as the TheForce.net's Jedi Council Forums. It wasn't long before that interaction wasn't enough: I needed more.

Throughout my time at Harwood Union High School, I'd pestered our band director to play the music from Star Wars. Poor Mr. Rivers put up with six years of me constantly asking, and eventually caved: the last concert that I played in, we played a selection of the music. That should of been enough, but we needed to do more: I invited the 501st Legion to come play.

This was 2003, and the group was much smaller then. I had found out about this amazing organization through pictures in Star Wars Insider, and figured that they might send someone up. To my surprise, one of them did: Scott. He drove up from Rhode Island, suited up and took part in the concert, marching down one of the central aisles. The crowd went nuts. I also knew what I wanted to do next: get one of my own.

Scott ended up selling me a suit of armor: a pre-trimmed FX kit that came with everything. I wasn't really aware of any presence in Vermont, although there were a couple of members. I trooped in public a couple of times, at Halloween. At college, I was the guy with the storm trooper suit. I attended Celebration 3, meeting other members of the group for the first time.

When I left college, the 501st turned out to be the perfect hobby for someone with a bit of disposable income and plenty of time on the weekends. I began making the long drive down every couple of weekends to anything I could get time to do: conventions, bookstore events, even escorted Snoop Dogg once in Times Square. I bought a Clone Trooper, and assembled it in my apartment.

There weren't many of my friends who were interested in the group, however. My friend Mike joined up, and we trooped together before he moved away. Then I found my friend Lara, and eventually convinced her to join. We got Dave to come out of retirement and join us. Another trooper joined us, then another, over the years. We trooped a bunch of things in Vermont, anything to establish a basic presence in the state. We dreamed of putting together a proper squad, so that we'd have a good, permanent presence in the state. I tracked recruits and followed up with people: more often than not, they didn't come through.

Then last year, we had a flood. We set up a booth at Vermont Comic Con, and got a long list of names: people who were genuinely interested. We did a group build; six boxes of Stormtrooper armor arrived at my house one day. I set up a Facebook group, e-mailed everyone on my list. By December, we had 10 people, and appeared at the first screening of The Force Awakens and blew everyone away.

And now, we just got word that our unit is now approved: the Green Mountain Squad is now, after so many miles, e-mails, chats and armor building sessions. It's more than just a unit: it's a community of like-minded people who share an interest in Star Wars, for sure, but who have bought in to the ideals of the 501st Legion: giving back to the community. I'm proud of the group that's come together: it's like finding friends who you knew were out there, but hadn't come across yet.

All of that comes down to Scott, who made that massive drive from Rhode Island, just to make a high school band concert the best that it could be.

I can't wait to see what we do next: I think that the best is yet to come.

Introducing The New England Garrison's Green Mountain Squad!

jRNAPwK This is the good news of the day: the 501st Legion has approved its newest squad: the Green Mountain Squad, which will cover all of Vermont!

I've been a member of the 501st Legion since 2003, and for much of that time, I've been one of only a couple of members of the group in the entire state. Since that time, we've had recruits come and go, but it wasn't until last year that we started seeing new members: a lot of them. We started 2014 with just three approved members. By December 2015, we had fifteen, with another 15 people currently building something. If all goes well, we'll double our numbers by this time next year.

I'm extremely proud of the group of members that we've pulled together: the entire squad is an amazing community here in Vermont, and we've really worked to encourage a positive and supportive environment. The result is that the squad meets regularly for social gatherings, and people have formed some really close friendships with one another.

It's amazing to see this finally exist. It's been a dream for a long time.


Help Peter Allen

Image As some of you know, I'm a member of the 501st Legion's New England Garrison, a group that's known for its charitable work in addition to its costuming. Over the years, we've helped out a lot of people, either by participating in walks or by visiting sick kids in hospitals. One of our own members in the NEG needs some help, and I'd like to spread the word a bit.

Peter is suffering from ALS, and we've heard that he doesn't have a lot of time. A couple of years ago, the NEG met Peter because of his love of Star Wars: he had been hoping to join our group, but because of his illness, he couldn't complete his costume. The Garrison stepped in and finished it for him, and inducted him as a member. He's now in Hospice care, and doesn't have a lot of time.

Peter's family has set up a GoFundMe account to help with some expenses, and garrison members are starting to chip in. I'd like to encourage you to do so, if you can.

I can't do much, but I can offer a bit of a carrot. If you make a donation of $30 or more, I'll send you a copy of War Stories: New Military Science Fiction. If you're you're from outside the United States, donate at least $15 and I'll get you an ebook copy (Sorry, shipping books internationally is just too time consuming and annoying). Here's what you can do:

  1. Make the donation.
  2. Take a screenshot or forward me your receipt for said donation, and an address where I can mail you the book.
  3. I'll send you a copy of the book. (And maybe another random one as well!)

My e-mail address is: liptakaa [at] gmail[dot]com.

Thanks in advance.